GROWING HEIRLOOM PEAS ORGANICALLY

Standard

IMG_0208

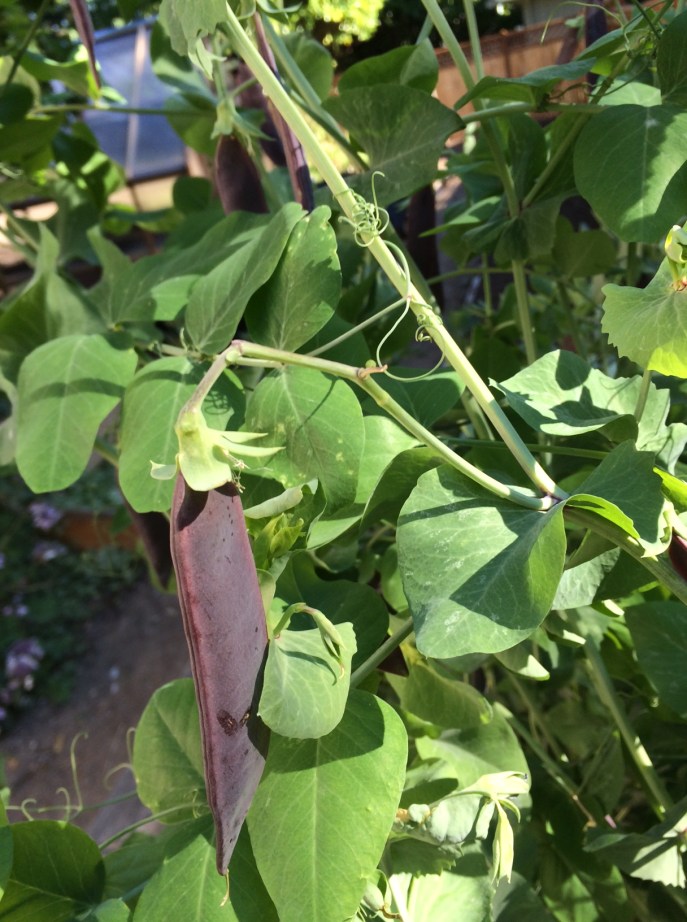
Above: The Blue-Podded Pea, dating to before 1596

Peas love good, rich, moist loamy soils.  Gypsum may be added to heavy clay soils to lighten them, and organic compost is excellent for building mountain and valley soils poor in nutrients.  Fish bone meal, alfalfa meal, and kelp meal are amendments that will provide the complete range of nitrogen, phosphorous and potash to your garden plot necessary for successful vegetable production.  Remember that organic soils are alive with microbes, so food tastes better, is more nutritious, and is safe to eat.  Also, organic soils capture carbon out of the air, reducing heating of our planet’s atmosphere. 

Peas have been grown as a garden crop for centuries and seem to have been a popular vegetable through all that time.  Several heirloom varieties of peas still exist:

‘Blauwschokker’ (Blue-Podded) pea is an ancient variety so old it was described in Gerard’s Herball  written in 1596.  Plants are very healthy and productive.  The pods can be eaten as snow peas when picked early, used as shelling peas later, and dry well for use as soup peas.  The vines of the Blue-podded pea grow 60 to 72 inches tall and require a trellis.

‘Alaska’ is an heirloom pea from 1880.  It is early, ripens all at once, and like many heirloom varieties will dry and keep well.  It is excellent for soup.  The vines grow about 30 inches tall.

‘Tom Thumb’ heirloom pea from 1854 is a miniature pea variety that does not need to be trellised.  The vines grow to 8 or 9 inches tall and are suitable for containers and for growing in cold frames early and late in the season. 

‘Lincoln’ is a famous variety from 1908 that is adapted to warmer American summers.  The vines grow to about 28 inches tall and the pods produce 8 or 9 peas each. 

‘Wando’ is very adaptable to differing climates.  It is more heat resistant than most peas and can be planted later.  ‘Wando’ dates to 1943 and the vines grow about 30 inches tall.

Because peas can take some frost, even while quite young, they can be planted early.  Some people living in milder climates than Montana’s plant their peas on St. Patrick’s Day; 17 of March. 

 Here in Western Montana we make our first sowing April 15 to 20 depending on the weather and the soil temperature.   A second sowing usually is made July 1 (after first crop is harvested.)  It is efficient use of space and easy picking if trellises are set up in the garden bed.  The first crop bears from around June 15 -July 1, and the second crop bears from about September 15-October 25.

Plant your peas in full sun for best production.  The ideal growing temperature is 55–70 F., with 60-65 F. being ideal (peas prefer cool weather).  The optimum soil pH for peas is 5.5-7.5.  Peas will germinate between 40-85 degrees F., but 60-75 F. ideal.  Germination may take 6-17 days.  Direct-sow pea seed 1 inch deep and 1 inch apart.  Plant a few extra at the end of the rows to fill in later as mini transplants.  

Water well; keep the bed moist, not wet.  For the second (midsummer) planting, plant seeds 2-3” deep 1 inch apart, otherwise the same as spring.   Do not let plants dry out at any time, especially during flowering!  Water peas early in the day only, allowing leaves to dry early in the day–steady moisture is best.    

Some pests of peas are: gophers, aphids, birds, mice, cutworms, mites, leafhoppers, cucumber beetles, pea weevils, and various caterpillars.   Powdery mildew can be troublesome also, especially if soil becomes dry and air circulation and sunshine is limited.

To harvest: pick peas when the first pods reach full size: 4”- 5”, not smaller.  Pick snow peas before seeds start to swell.  Snap peas need to be picked when pods are full size, fat, and round with peas inside.  Check and pick every 3 days to keep plants producing.  The first peas ripen at the base of the plant—remove them carefully to not damage plants.  The harvest period should be 4-6 weeks long, for each planting.  Pick all (ready) pods to keep vines producing.  After harvesting keep cool, in high humidity and out of the sun. 

Keep freshly picked peas cool, in high humidity and out of the sun.   Store them in a cool location or in the refrigerator.  Picked pods last only 5-6 days.  Peas do freeze well and most varieties dry and store well. 


GROWING FRESH VEGETABLE SPROUTS

Standard

Sprouts


You can grow fresh, nutritious, organic vegetables right in your kitchen any time of year!   Nutritious sprouts can be grown from seeds in 3-6 days.  Germination releases a variety of nutrients, enzymes and proteins that makes sprouts easier to digest than dry seeds.  Sprouting increases the amount and bio-availability of proteins, vitamins and minerals.  Sprouts are high in protein, low in fat, high in fiber and loaded with vitamins. 

Sprouts are more concentrated in food value than fully grown vegetables, but most people add them to foods rather than eating them alone.  You can use fresh sprouts to finish a salad, or put them in a sandwich.  Sandwich fillings can be made by grinding sprouts to a paste.   Sprouts also make healthy, flavorful additions to stir fry dishes, soups and casseroles.  Some more popular uses are as additions to dips or fresh juices.  Sprouts can be added to pancake batter or scrambled eggs, too. 

To sprout seeds at home, purchase organically grown seeds labeled for sprouting.  This will be the cleanest, safest seeds you can use.  Start with small amounts of seed.  Try a tablespoon or two, or up to ½ cup if you are sprouting larger seeds, such as mung beans or peas.  Room temperature (65 to 75 degrees) is perfect for sprouting.  The rinse water should be about the same temperature.  Place the seeds in a wide mouth quart glass jar and then wash (rinse) them thoroughly with clean water.  A special sprouting jar lid will work well to drain the seeds, or cheesecloth fastened with a rubber band can be used.  Fill the jar with 2 cups of water and soak the rinsed seeds for 8 hours, or overnight.  In the morning, drain the seeds and rinse them again, twice.  Place the jar upside down, at an angle inside a clean bowl to finish draining for a few minutes.  Place the jar right side up again and place it out of direct sunlight, but not in total darkness (some seeds need light to germinate).   Rinse the seeds at least twice a day for the sweetest, freshest taste.  

When to harvest varies with the kind of sprout grown.  Most are ready in 3 to 4 days, but some take longer (mung beans take about 6 days).  Experiment with tasting the sprouts to see what size you prefer.  Usually they taste sweetest when tails emerge.  After harvest, store sprouts in covered containers in the refrigerator.  Fresh sprouts will last about a week in the refrigerator. 

You may have heard of problems with commercially grown sprouts that made people sick.  As long as you use clean jars and lids and rinse the sprouts at least twice a day there is little chance of a problem.  Remember to wash your hands after handling raw meat, and before touching fresh sprouts or any raw, uncooked food, as you prepare a meal. 

Some favorite sprouting seeds are: alfalfa, which is a cancer preventative loaded with vitamins A, B, C, D, E, F and K; mung beans, loaded with protein, fiber and vitamins A, B, C, and E, plus trace elements; peas, with vitamins A, B, C and E, and trace elements.  Broccoli, cabbage, mustard, arugula and radishes are all excellent and nutritious.  Several blends of sprouting seeds are now available.  They are packed with vitamins, minerals, proteins and fiber.

JANUARY GARDENING CALENDAR

Standard

photo (105)

JANUARY GARDENING CALENDAR


This is the time to plan your 2017 garden.  Seed racks will be in garden stores soon.  Nowadays there are several companies selling organically grown seeds, some of them grown right here in the Flathead area!  January is an excellent time to test the germination rate on your saved seeds.  You can get a rough estimate of percentage if you sprout some now.  Put ten seeds folded into a moist paper towel.  Place the moist towel on a plate, loosely covered with plastic wrap or waxed paper and put it in a warm place to test germ.  The top of the refrigerator is a convenient spot to do this.  If 9 out of 10 seeds germinate you can bet on about a 90% germ.  If a variety germinates poorly, you can plant extra seeds if you have them, or buy fresh seed.  Also, check past records and eliminate any varieties that you did not like, or did not do well in your garden.  Composted manure can be spread on vegetable beds, right on top of the snow if you want.  Spring melt and rains will draw nutrients down into the soil.  This month is a good time to repair garden tools, and obtain or make plant supports and cold frames.  Locate frames and hotbeds for winter/spring growing outside in sunny, protected locations.

Check stored fruits and vegetables for spoilage.  Watch cold frames; admit air on days when the temperature goes above freezing and be sure to cover them at night.  Clean and weed lettuces and other winter greens growing in cold tunnels or frames.  Use leftover Christmas tree boughs to mulch perennials, strawberries, roses, etc.

Prepare any planned garden designs.  Be sure to rotate planting locations of vegetables and flowers every season for best health and disease prevention.

Indoors, sow strawberries and perennials early.  Beginning the 15th, sow cauliflower and cabbage seed inside for growing in frames.  Sow eggplant, onions, leeks, and early peppers.  Sow perennial herbs: oregano, thyme, feverfew, Greek oregano, lavender, rosemary, chives, chamomile, hyssop, horehound, catnip, parsley, rue, lemon balm and salvia.

Harvest winter greens from frames and tunnels as well as spinach, lettuce, kale, chard, onions, parsnips, leeks and carrots.

Sow primrose and auricula seed in a cool greenhouse; protect auriculas from severe frost and rains.  Ventilate auriculas and other alpines in the greenhouse—keep plants on the dry side as they will be dormant.  Prepare to top dress containerized plants (in a cool greenhouse) with manure or compost in February.

Ventilate sweet violet frames daily; pick off dead foliage and keep the glass clean.  Transfer potted sweet violets, pansies and violas to the greenhouse to flower.  Other plants (previously potted) to force inside now include: honeysuckle, roses, jasmine, carnations, sweet William, wallflowers, stocks, narcissus, ranunculus, early dwarf tulips and lily of the valley.  Take cuttings of geraniums and fuchsias.  Force potted strawberries (potted in Sept.) in hotbeds or greenhouse.  Check winter mulches and covers; mound up snow to keep perennials and roses protected from dry cold.  Have a great gardening year in 2017!


GROWING VEGETABLES IN CONTAINERS

Standard

IMG_0677 IMG_0678

My pictures show heirloom French cantaloupe ‘Prescott Fond Blanc’ and ‘Ananas D’Amerique a Chair Vert’.  The containers were too small to mature the fruit, so I repotted them into much larger 24″ by 24″ pots.  The frame helped ripen the fruit in the climate of cool western Oregon. 

Raising vegetables in containers is an excellent option for those of us who are living in a dwelling temporarily, are short of space, or have poor soil.  Containers are useful and versatile; pots can be moved around if a location is too hot, windy or shady.  Plants that enjoy heat, such as melons, squash, peppers, tomatoes and eggplant can be placed in front of a warm south or west wall to ripen faster.  Also, if spring cold weather threatens, pots may be moved inside overnight, or even a few days for protection.  The same advantage applies to the fall season; if weather turns cold and your crop is not yet ripe you can bring pots inside.    

Containers for vegetables should be at least 12 inches by 12 inches for a single tomato or eggplant, but much larger containers are needed for melons, squash and pumpkins—at least 24 inches by 24 inches for each plant.  Smaller crops, such as carrots, beets, broccoli, cabbage, Swiss chard, spinach, lettuce, etc. need a container at least 10 inches deep, and yields are better if the pots are 24 to 36 inches wide.  For peas and beans, some gardeners have good success with containers shaped like long rectangles, perhaps 12 inches wide by 48 inches long and 10 or more inches deep.   It is easier to move your containers around if you have them on rollers.  And if you build your own containers, use non-treated water-resistant wood such as cedar, redwood or cypress.  The new fabric containers are useful, reusable and inexpensive, but cannot be moved during the season. 

The soil mix for vegetables should be rich, moisture-retentive, but quick draining.  Plant roots need air to thrive.  I use a mix of two parts organic potting soil, one part rotted manure or compost, and one part perlite or sharp sand.  Consistent, frequent applications of manure tea, liquid seaweed or a complete organic fertilizer will keep your vegetables growing well. 

Watering is very important when growing in containers.  Check plants every day all season long.  If weather is hot and the plants are large, you might have to water two or three times a day.  Automatic drip watering systems are an option if you will be away for a few days. 

When planting seeds, follow directions on the package and read about how to care for each vegetable.  “Patio”, “bush” or dwarf varieties of vegetables are good choices for containers.  They tend to be compact, productive plants with normal size or slightly smaller fruit.  Vegetable seeds that can be planted now (July) include: lettuce, spinach, peas, radishes, carrots, corn salad, and Swiss chard.  Plant starts of cabbage, cauliflower, broccoli and kale can be planted now for late fall harvest.  Starts of tender vegetables that can be planted in containers now include: tomatoes, squash, pumpkins, cantaloupe, watermelon, eggplant and peppers.