SUSTAINABLE ORGANIC GARDENING WITH COVER CROPS

Standard

oats and field peas cover crop

Healthy, living soil is a vital component of an organic garden.  Soil covered with growing things draws carbon out of the atmosphere and stores it in roots, stems, and leaves.  In sustainable, earth-friendly gardening /farming we do not allow land to fallow, but keep our soil covered with actively growing or dormant plants all year.  This is a win-win situation for your garden; you can have abundant crops yet at the same time help reduce the amount of CO2 in earth’s atmosphere. 

Cover crops build and protect your soil by increasing humus and nutrients.  Cover crops will add organic matter, smother weeds, prevent erosion, break up  compacted soil, provide livestock forage and attract beneficial insects.  In dry summers or dry climates cover crops provide a kind of living mulch, preserving soil moisture. 

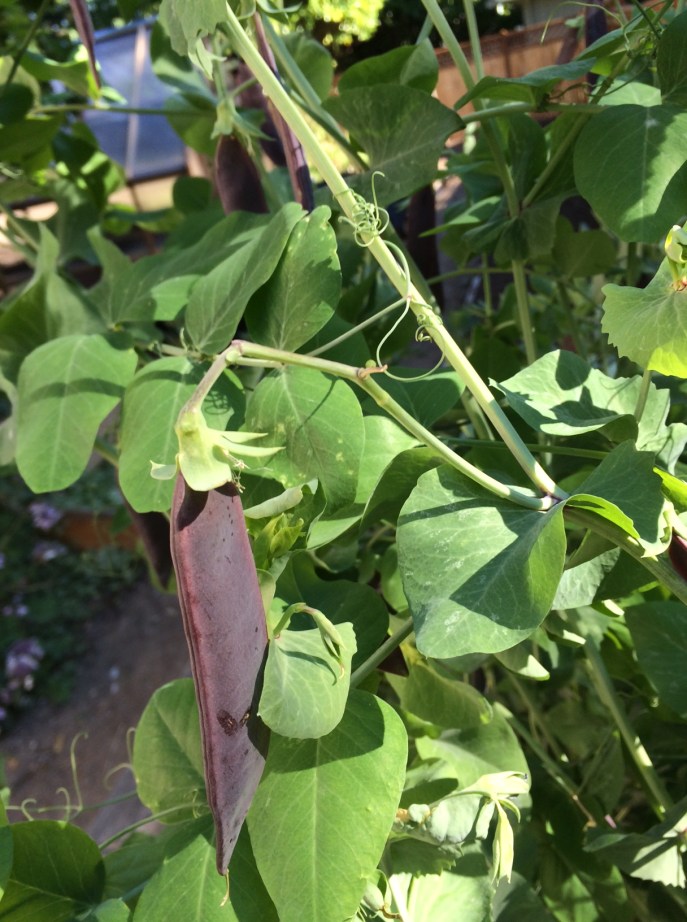
The timing of planting and turning under of cover crops is varied, depending on climate, soil requirements, and time of year.  Here in the north (Western Montana) our growing season is short so we have to be precise in our timing of planting, cutting and turning under cover crops.  After vegetables are harvested in the fall a cover crop can be planted immediately.  First, remove vegetable debris; second, till or rake and prepare a six-inch deep seedbed; third, irrigate to moisten soil; and finally, plant your cover crop.  Fall planted cover crops might include: hairy vetch, field peas, crimson clover, summer alfalfa, Mammoth red clover, annual rye grass, winter cereal rye, winter barley, winter wheat, winter oats ,or winter triticale.  Peas or hairy vetch planted together with one or another of the fall/winter cereal grains will add nitrogen and organic matter to the soil.  Oats and peas planted together or hairy vetch and winter rye together are quite effective combinations for fall cover crops.  The grain will protect the legumes somewhat from winter damage, though peas will probably winter kill.  Hairy vetch will vigorously regrow in the spring and can be mown and turned under.  Any cover crop of the grass family, such as cereal grain or annual ryegrass needs to be turned under at least three weeks before a vegetable crop is planted.  Some cereal grasses are allelopathic, which means they release growth inhibiting chemicals that prevent seed germination of other species.  It takes three or more weeks for the chemicals to dissipate.  Since our spring is often late, and short, and sometimes wet, the timing of turning under your cover crop is very important.  In a home garden, if you plan to plant some cool-weather crops early, such as onion sets, cole crops, or spinach, you can pull up or chop out a (non-grass family) cover crop in early spring just before you plant.  It is easy to hoe out hairy vetch by cutting it off below the crown.  You can then prepare the soil and plant immediately. 

Several cover crops can be planted in spring if you have about four to six weeks’ time before you plan to plant a crop.   An example might be if you plan to put in a warm-season crop such as peppers or tomatoes.  A cool-weather cover crop could be put in as soon as the soil could be worked (sometimes as early as April 10 or as late as May 5).  Some useful, early spring cover crops include: crimson clover, medium red clover, Mammoth red clover, white clover, or field peas.  If you have four to six weeks growing time plus three weeks’ time after taking down a cereal grass before you plant you could put in spring oats and field peas, or annual ryegrass.   The plot would be ready to plant your vegetable crop by mid to late June in our Montana climate.  This would limit your choices to fall-maturing cool-weather crops such as cauliflower, Brussels sprouts, lettuce, carrots, etc.

If you plan to have a cover crop during the warm season, buckwheat , mustard, turnips or phacelia all work well in our climate.  Remember to cut mustard or buckwheat when in flower so it will not reseed.   Phacelia will reseed also, but has a long blooming season and is a great pollinator attractant.  Turnips are biennial, so will not reseed the first year. 

In a home garden cover crops need to be considered in crop rotation.  It is best not to plant a cover crop of the Brassica family (Cole crops, such as turnips, mustard, radish, cabbage, etc.) where cole crops are to be planted the following season.  The rule of thumb is to rotate crops so that members of the same plant family are not grown in the same spot for three years or more.  In our certified organic market garden we use a nine year crop rotation plan.  A more practical home garden rotation plan might be only four-years. 

GROWING HEIRLOOM PEAS ORGANICALLY

Standard

IMG_0208

Above: The Blue-Podded Pea, dating to before 1596

Peas love good, rich, moist loamy soils.  Gypsum may be added to heavy clay soils to lighten them, and organic compost is excellent for building mountain and valley soils poor in nutrients.  Fish bone meal, alfalfa meal, and kelp meal are amendments that will provide the complete range of nitrogen, phosphorous and potash to your garden plot necessary for successful vegetable production.  Remember that organic soils are alive with microbes, so food tastes better, is more nutritious, and is safe to eat.  Also, organic soils capture carbon out of the air, reducing heating of our planet’s atmosphere. 

Peas have been grown as a garden crop for centuries and seem to have been a popular vegetable through all that time.  Several heirloom varieties of peas still exist:

‘Blauwschokker’ (Blue-Podded) pea is an ancient variety so old it was described in Gerard’s Herball  written in 1596.  Plants are very healthy and productive.  The pods can be eaten as snow peas when picked early, used as shelling peas later, and dry well for use as soup peas.  The vines of the Blue-podded pea grow 60 to 72 inches tall and require a trellis.

‘Alaska’ is an heirloom pea from 1880.  It is early, ripens all at once, and like many heirloom varieties will dry and keep well.  It is excellent for soup.  The vines grow about 30 inches tall.

‘Tom Thumb’ heirloom pea from 1854 is a miniature pea variety that does not need to be trellised.  The vines grow to 8 or 9 inches tall and are suitable for containers and for growing in cold frames early and late in the season. 

‘Lincoln’ is a famous variety from 1908 that is adapted to warmer American summers.  The vines grow to about 28 inches tall and the pods produce 8 or 9 peas each. 

‘Wando’ is very adaptable to differing climates.  It is more heat resistant than most peas and can be planted later.  ‘Wando’ dates to 1943 and the vines grow about 30 inches tall.

Because peas can take some frost, even while quite young, they can be planted early.  Some people living in milder climates than Montana’s plant their peas on St. Patrick’s Day; 17 of March. 

 Here in Western Montana we make our first sowing April 15 to 20 depending on the weather and the soil temperature.   A second sowing usually is made July 1 (after first crop is harvested.)  It is efficient use of space and easy picking if trellises are set up in the garden bed.  The first crop bears from around June 15 -July 1, and the second crop bears from about September 15-October 25.

Plant your peas in full sun for best production.  The ideal growing temperature is 55–70 F., with 60-65 F. being ideal (peas prefer cool weather).  The optimum soil pH for peas is 5.5-7.5.  Peas will germinate between 40-85 degrees F., but 60-75 F. ideal.  Germination may take 6-17 days.  Direct-sow pea seed 1 inch deep and 1 inch apart.  Plant a few extra at the end of the rows to fill in later as mini transplants.  

Water well; keep the bed moist, not wet.  For the second (midsummer) planting, plant seeds 2-3” deep 1 inch apart, otherwise the same as spring.   Do not let plants dry out at any time, especially during flowering!  Water peas early in the day only, allowing leaves to dry early in the day–steady moisture is best.    

Some pests of peas are: gophers, aphids, birds, mice, cutworms, mites, leafhoppers, cucumber beetles, pea weevils, and various caterpillars.   Powdery mildew can be troublesome also, especially if soil becomes dry and air circulation and sunshine is limited.

To harvest: pick peas when the first pods reach full size: 4”- 5”, not smaller.  Pick snow peas before seeds start to swell.  Snap peas need to be picked when pods are full size, fat, and round with peas inside.  Check and pick every 3 days to keep plants producing.  The first peas ripen at the base of the plant—remove them carefully to not damage plants.  The harvest period should be 4-6 weeks long, for each planting.  Pick all (ready) pods to keep vines producing.  After harvesting keep cool, in high humidity and out of the sun. 

Keep freshly picked peas cool, in high humidity and out of the sun.   Store them in a cool location or in the refrigerator.  Picked pods last only 5-6 days.  Peas do freeze well and most varieties dry and store well. 


ORGANIC GARDENING NOTES FOR SPRING

Standard
IMG_2891

GREAT WESTERN, HYBRID BOURBON

IMG_2830

DOUBLE WHITE, PIMPINELLIFOLIA (SPINOSSISSIMA)

IMG_5070

LAURE, CENTIFOLIA


ORGANIC GARDENING NOTES FOR EARLY SPRING

The ground is thawed in the valley and soon the foothills will be snow free.  As soon as the earth dries out and wet turns to moist, you can work up the soil.  Dry organic amendments can then be forked into your beds.  Organic blood meal (13-0-0) is an excellent source of nitrogen and is quickly taken up by plants.  Alfalfa meal (3-1-3) will enrich soil with a moderate amount of nitrogen, small amount of phosphorous, and a moderate amount of potash.  Ground fish bone meal (5-16-0) also contains moderate amounts of nitrogen, but is a terrific source of phosphorous.  

Well-rotted manure (usually about 3-1-1) will add a good amount of nitrogen and smaller amounts of phosphorous and potash, but adds lots of beneficial, moisture-holding organic matter.  Be careful in sourcing manure as it may contain high levels of salt (especially if sourced from feed lots).  It is safest to use one year old, well-rotted manure on food crops.  Too fresh of manure will burn crops and can contain pathogens.  In our USDA Certified Organic market garden we are only allowed to use manure from grazed land that is at least one year old; and it must be applied at least 120 days before crops are planted.   Another option is to use manure that has gone through a heat of at least 160 degrees F. for 3 weeks; this kills harmful pathogens.  Compost may be spread on a USDA Certified Organic farm or garden but it must be made only from vegetable matter—no meats, dairy products or eggs, etc.  

If you are starting a new garden bed, spread cardboard, rotted moist straw, or tarps to kill grass out.  Newspapers will dry up and blow away unless anchored by rocks or chunks of turf.  You can till right into the turf to prepare your spot, but weeds will be present and you will have to keep after them.  Try to till only once, pull weeds out, add amendments and mulch the soil until ready to plant.  Too frequent tilling destroys the structure of the soil and causes it to release carbon.

Remember that healthy organic soils are alive with microbes and fungi that help plants pull CO2 out of the atmosphere.  By gardening organically you are helping the earth to gather and store carbon dioxide.  This is exactly the opposite environmental effect of conventional gardening, which uses chemical fertilizers and often features bare soil.  Chemical fertilizers require large amounts of carbon to make and bare soil causes soil organisms to die; with the result that soils lose carbon rather than pulling carbon out of the atmosphere and storing it. 

Forest, grassland and hedgerow soils pull the most carbon from the atmosphere of any land ecosystems.  In your garden, you can help this process by setting aside areas for wildflowers and grasses, shrubs, shrub borders and shelter belts or groups of trees with wildflowers and/or groundcovers underneath.  You will be providing habitat for endangered native bees, butterflies, birds and reptiles as well as building carbon storage. 

Now is the time to start your peppers, onions, leeks, tomatoes, tomatillos, and eggplants from seed to set out in May.  Wait until late April/early May to start squash, pumpkins, watermelons, canteloupes, etc.   If you plan to set out cauliflower, cabbage, kale, broccoli or other cole crops in mid-to late April, start them from seed inside now also.   A soil free organic seedling mix can be made from: 3 parts peat, 2 parts vermiculite, and 1 part perlite.  Heat mats placed under flats will aid germination of crops that like warm temperatures, such as peppers and tomatoes.   An east facing window is satisfactory, or fluorescent lights hung a few (8 to 10 inches) inches above the flats. 

Soon containerized fruit trees, shrubs, roses, bulbs, perennials, plus annual flowers and vegetables will be available in your local organic garden shops.  This year, I have grown several varieties of Certified Organic shrub roses on their own roots, found on old homesteads here in the Mission Valley:

‘Great Western’, a Hybrid Bourbon shrub rose is a long-time favorite in our area.  This rose was introduced in 1838, named after one of the first transatlantic steam ships.  It blooms for about three weeks in late spring/early summer. The plant is tall and wide, about 6 feet tall and 5 feet wide.   The flowers are fully double; a blend of rich reds and purples, with wonderful fragrance.  My grandmother grew this rose and there are plants at the museum in Ronan.  ‘Great Western’ is a hardy, easy to grow shrub rose.  The plant spreads slowly. 

‘Laure’, a Centifolia rose from 1837, was found in Ronan, at an old home built in 1913.  It is a rather short plant, with fully double, fragrant, powder pink blooms.  It is also a once bloomer, with a flowering period lasting about 3 weeks in late spring/early summer.  The plant spreads once established, but this is an advantage if your garden has an abundance of voles.  When a young plant is put in, a vole cage could be placed around the roots, but the plant will eventually spread outward and in later years a plant with an abundance of root stems will survive vole trails.  

‘Double White Scotch Rose’ introduced in 1808, is another locally found variety.  It has pure white, double, fragrant flowers in late spring.  It is of the same rose family as ‘Harison’s yellow’ the popular, thorny, hardy yellow shrub rose.  ‘Double white is equally hardy and trouble free, and spreads on its own roots to form a beautiful large group of plants.  I have seen established plants about 7 feet tall and spreading to about 8 or 10 feet wide.

Have a great spring!


LOWER YOUR PERSONAL CARBON FOOTPRINT

Standard

img_5619.jpg

LOWER YOUR PERSONAL CARBON FOOTPRINT

Every day we see news reports or read about the devastating effects of climate change and frightening predictions of damage to our planet’s ecosystem.  Most scientists agree that the earth’s climate is warming due to massive carbon dioxide emissions.  Many of us feel powerless to affect changes, but each one of us, as individuals, can make choices to limit carbon dioxide emissions.  We can do this by our own, in our day to day lives.  I have put together a list of 10 things each of us can do to help limit increases in CO2 emissions and even help to capture emissions out of the atmosphere.

  1. Reduce your air travel. Airplanes produce a huge amount of carbon. Take the train, or a bus, or travel with others in an automobile.  One air flight from Los Angeles to New York adds about 25% to the yearly total of the average person’s carbon emission footprint.
  2. Purchase meat produced locally from animals that have been grass-fed on pastures. Try to determine that the land has not been overgrazed. Healthy, well-managed grasslands actually capture a huge amount of carbon dioxide through the growth of grasses, which pull CO2 out of the atmosphere and store it in their leaves, stalks and roots.   Locally purchased meat means it was not shipped over long distances using fossil fuels, so the total carbon emissions are much lower. 
  3. Inspect your home heating system and your home’s insulation. Replace old heating units with new, energy-efficient models. Block drafts, install storm windows or double-pane windows, and add more insulation if needed, especially in attics and floors.   Insulating curtains are helpful in winter to conserve heat. 
  4. Replace any older, inefficient appliances and maintain those you have. Replace older incandescent light bulbs with new LEDs (light-emitting-diodes). Consider adding solar or wind-powered technologies to assist or even replace your power source. 
  5. Maintain your automobile and farm equipment so that all machines run efficiently (thereby using less fuel). Make fewer, more efficient trips in your vehicle and try to car pool with others to save fuel. Having just one more person with you in the vehicle reduces your carbon footprint by half on that road trip.
  6. Use principles of conservation farming on your farm and in your garden. These techniques actually capture CO2 out of the atmosphere!   Forests, hedgerows and grasslands are huge carbon sinks, because growing plants pull carbon from the air and store the excess in their stems, leaves and roots.  Protect the carbon-holding ability of your soil by reducing tilling or not tilling at all.  Rotate crops every year, use organic fertilizers, such as composts and manures, taking care to not over-apply nitrogenous fertilizers that may be washed into water systems.  Do not leave soil to fallow (this causes degradation of soil animals which help plants capture carbon).  Use cover crops as these build soil and capture carbon.  Do not overwater as this smothers soil animals and washes CO2 out of your soil.  Do not overgraze pastures as this reduces carbon capture significantly. 
  7. Consume less by buying fewer, but better products that last longer. Making any one new product uses a lot of carbon. Avoid heavily packages foods and one-use (disposable) products.  Try to purchase products in biodegradable plastic containers and recycle whenever possible. 
  8. Buy locally-produced food. Much carbon is wasted shipping food thousands of miles from where it was grown. Avoid items that have been flown in by air as they have an enormous carbon footprint.  If you garden, try preserving your own food by canning, pickling and drying.   Dried foods are the most efficient and use the least carbon, especially if a solar food dryer is used.  Vegetables and fruit can be stored and kept in a root cellar with a passive ventilation system, which uses no power.
  9. As much as you possibly can, buy any and all products from companies that support committing to a low-carbon future. Because our businesses in our economy are so sensitive to demand, carefully choosing low-carbon footprint products may affect change more quickly than anything else.  
  10. Consider turning part of your lawn into a wildflower garden (make sure this uncut area is at least 12 feet away from the house for fire safety). This will gather more carbon than a regular, trimmed and cut lawn and will promote the growth and presence of native insect pollinators, and reptiles and birds. Plant hedgerows, trees and shelterbelts on your property using well-adapted and native species.  Hedgerows and forests gather the most carbon of any ecosystem on our planet.  Using organic gardening methods will protect and nurture your soil.  It has been estimated that if the entire world switched to organic farming and gardening practices, enough CO2 in the atmosphere would be collected to lower CO2 to preindustrial levels in only three years!

BIBLIOGRAPHY:

Ingram, Dr. Julie, Best Practices for Soil Organic Carbon Management in Agricultural Systems, Countryside & Community Research Institute, UK , 2017

Goode, Cecile M., et. al. Understanding the Impacts of Soil, Climate & Farming Practices on Soil Organic Carbon Sequestration, Australia, 2016

Muchmuller, Megan B., et. al., Emerging Land Use Practices Rapidly Increase Soil Organic Matter, USA, 2015

Zhang, Limimg, et. al, “Toward Optimal Soil Organic Sequestration With Effects of Agriculture Management Practices & Climate Change in Tai-Lake Paddy Soils of China,” In Geoderma, 2016

Smallwood, Mark, Regenerative Organic Agriculture & Climate Change, Rodale Institute, 2013

ORGANIC GARDENING CAN REDUCE CARBON EMISSIONS

Standard

Montana Native Wildflower Mix

THE LOW CARBON FOOTPRINT OF ORGANIC GARDENING


We have all heard about rising carbon dioxide gas (CO2) levels in the earth’s atmosphere, which is causing heating, resulting in world-wide climate change.  The atmosphere holds about 800 billion tons of carbon at present.  Another 560 billion tons of carbon is stored in living plant life.  However, the soils of the earth hold the most carbon, about 2,500 billion tons!  Forest and grassland soils contain the most carbon, and soils degraded by chemically-drenched agricultural practices hold the least.  Rainforest soils can contain as much as 10% carbon of total mass, while the poorest and exploited soils have been reduced to as little as 1% of mass.  The process of photosynthesis by plants pulls CO2 out of the air and stores it in living tissues, excess carbon is released through the roots into the soil where it is stored.  This process is known as carbon sequestration.  Plant roots use living soil fungi (mycorrhizae) in the process.  Degraded soils have reduced numbers of these fungi, slowing their ability to sequester carbon.

It is estimated that the world’s agricultural soils have lost 50-70% of their original carbon. Most of that carbon has become CO2 and was released into the earth’s atmosphere.   If that carbon could be returned to the earth’s soils, the carbon in the atmosphere could be reduced enough to mitigate global warming and limit heating to 1.5 degrees Celsius.  We could do this by changing to organic gardening and farming practices. 

Gardening and farming practices that degrade soil are: fallowing, stubble burning, frequent tilling, overgrazing, monoculture cropping and excess application of synthetic fertilizers.  All of these reduce the soil’s carbon-holding capacity, soils dry and erode, and CO2 is released into the atmosphere.   

Organic gardening practices build living, healthy soils able to sequester much higher levels of carbon.   Farming trials in several countries around the globe have shown a rapid increase in carbon in soils where organic gardening and farming methods were employed.  A key to this is increasing organic matter in the soil. 

Methods known to restore soil’s ability to process and store carbon include: tilling as little as possible or not tilling, mulching, using cover crops, management of crop residues, crop rotation, and proper irrigation. 

If you are preparing a new garden space, place a heavy mulch of rotted, damp straw and compost or manure (or bedding from livestock stalls) onto the space for your garden plot.  This will smother existing plants and is best done in fall to be left in place all winter.  In spring, till the garden space, turning the straw and manure under.  This should be the only time you will need to till the soil.  Plant your garden crops immediately, and any areas to be planted later can be seeded to a cover crop.  A thick cover crop will smother weeds and will pull carbon from the air while it builds your soil. 

Rotate your garden or field crops in a four-year (or more) rotation.  (Each kind of plant is grown in a location in the garden or field once every four years.)  This will discourage pests and diseases.  Mulch your garden; this keeps soil animals alive and keeps soils moist and cool.  (Heated or dried soils lose carbon.)   As you weed, either compost the weeds or incorporate them into your soil.  The best time to add manures or compost is in spring or fall.

Plant shelter belts or hedgerows near or around your garden.  These will become homes for pollinators, birds, snakes and other animals beneficial to your garden.  Forests, hedgerows and grasslands hold the most carbon on the planet, so hedgerows and shelter belts help reduce emissions.   

Do not overgraze or till grasslands, because that will reduce the carbon-holding capacity. 

In flower beds and borders, prepare your soil the same way as for vegetables and plant perennial ground covers to act as living mulches.  In low-water landscapes, sedums or creeping yarrow planted between larger plants will act as living mulches.   

Changing to the regenerative methods of organic gardening and farming will result in lower CO2 emissions, healthy foods, heathy wildlife, clean air and clean water. 


Bibliography:

Ingram, Dr. Julie, Best Practices for Soil Organic Carbon Management in Agricultural Systems, Countryside & Community Research Institute, UK , 2017

Goode, Cecile M., et. al. Understanding the Impacts of Soil, Climate & Farming Practices on Soil Organic Carbon Sequestration, Australia, 2016

Muchmuller, Megan B., et. al., Emerging Land Use Practices Rapidly Increase Soil Organic Matter, USA, 2015

Zhang, Limimg, et. al, “Toward Optimal Soil Organic Sequestration With Effects of Agriculture Management Practices & Climate Change in Tai-Lake Paddy Soils of China,” In Geoderma, 2016

Smallwood, Mark, Regenerative Organic Agriculture & Climate Change, Rodale Institute, 2013


NOVEMBER GARDENING CALENDAR

Standard

cabbage-red-express

Cold winter weather does limit what we can do in the garden in November in our northern Rocky Mountain climate (USDA zones 3, 4 and 5).  If ground is still unfrozen, prepare beds for next spring’s early crops.   If you still have unfrozen manure or compost it can be spread over vegetable and flower beds and trenched into furrows to receive frost (this will break down over winter and lighten and feed the soil).  I have spread manure and compost right over the snow on planting beds and it worked just fine. 

Check over which varieties of flowers and vegetables you liked or disliked this year.  Make a note of which ones did well.  Keep your records up to date if you can.  Check stores of fruits and vegetables and discard spoiling ones.  Clean all your tools, oil wooden handles and replace cracked ones.  Drain gas and oil out of lawnmower for winter. 

Finish planting garlic, shallots, and Egyptian walking onions before the ground freezes solid.

Have row covers ready for remaining crops in the field; also have covers ready for cold frames.    Carefully store row covers before winter; make sure the fabric is dry before folding and storing. 

Early in the month, if not done earlier, harvest and store cabbages.  To store them, turn them upside down to dry, take off extra leaves and place them in a trench of sand and cover with a wet-proof cover open at both ends to keep them dry.  Close the ends of your cover with straw when frosty.  Also, to store beets, carrots, parsnips, turnips, salsify for winter: dry and cut the leafy tops off.  Dig a pit in a dry place if possible.  Put down 2 inches of sand, then the vegetable roots, then more sand, alternating.  Cover them with a final layer of sand and straw to protect them.

Admit air to cold frames and the greenhouse on sunny days; pick off any mildewed or moldy leaves.  Apply manure or compost to outdoor asparagus and rhubarb beds to 4 inches deep.  Weed onions, leeks, spinach, mache, cresses.  In frames, when it is cold, cover lettuces, cabbages, etc.  Harvest late and frame–grown cabbage, spinach, carrots, peas, cauliflower, lettuce, broccoli, Brussels sprouts.

If the ground has not frozen solid, finish dividing and replanting perennials before winter freeze-up.  Transplant seedling perennials and flowers into flats; keep them in a cold frame or cold greenhouse.  Mulch primroses, bleeding hearts, and any marginally hardy perennials with pine or fir branches.  Cut back established pansies and collect violet seed.   

Finish planting bulbs out and plant bulbs to be forced in pots.  Weed bulb beds and spread bone meal if not done last month.  Put poultry netting over the top of the soil of newly planted tulips, crocus and hyacinths to discourage squirrels and cats who like to dig and scratch into fresh soil.  Plant these same bulbs in Vole King wire baskets to protect from voles. 

In the greenhouse plants will be at rest.  Keep their foliage dry and do not overwater!  Succulent plants such as cacti may need little or no water all winter.  If mold appears, dust with sulfur.  Moving air inside a greenhouse discourages mold. 

If you plan to keep any plants in pots over the winter, plunge them up to their pot rims into a holding bed.  The reason for doing this is that plant roots suffer greatly from the wide temperature swings of air during winter.  Good substances for this are: fine gravel, bark, sand, sawdust or soil.  If you have any bulbs, perennials, roses or shrubs growing in pots outside, be sure to sink them up to the rims to protect them from cold over winter. 

Cover cold frames if it is frosty and cold.  If you vent the frame, make sure no direct sun hits plants while they are frozen. 

Weed fruiting shrubs, add manure to raspberry beds.  Finish storing apples, pears, etc.  Clean all leaves and mummy fruit around trees to prevent disease and discourage insects.  Sow seeds of fruit trees and rootstocks.    

Finish planting deciduous shrubs and trees.  Mound soil around the base of tender hybrid tea roses to a depth of about 10 to 12 inches.  Evergreen boughs may be placed over the soil mound.  The soil and boughs will protect the lower portion of tender rose plants over winter. 


FALL APPLE AND PEAR TREE CARE

Standard


FALL APPLE AND PEAR FRUIT TREE CARE

By James Sagmiller

HARVESTING

Now is the time to gather ripe apples and pears.  Be sure to pick while weather is dry.  As you harvest, discard/destroy any diseased fruit or “mummies” into a hot, active compost pile or burn them.  Feed fallen fruits to cattle, horses, or pigs.  Pick unripe winter pears before hard frosts so they will ripen in storage and keep better.  (Frosted pears will rot in storage).  To gather ripe fruit, gently twist one way or another; a ripe apple or pear comes off easily. 

STORING

Before storing, dry the fruit in heaps in a shed for 10 to 14 days.   Wipe each apple or pear dry with a clean, dry cloth and wrap each one in brown paper and store in wooden barrels or bins.   As you wipe, inspect the fruit for bruises or decay and discard or use those immediately rather than storing them.  Another good method is to store the fruit in completely dry sand, sawdust or straw in barrels or bins.  The storage cellar needs to be cool and dry, with protection from frost.  I like to store apples away from potatoes because apples seem to take on a potato flavor after a few months of storage, if they are stored next to each other. 

PROTECTION

September is a good time to paint the trunks of your fruit trees to prevent sunscald.  Sunscald happens in spring when the sun hits frozen sap in the tree trunk.  Painting the trunk white with interior latex paint will reflect the sun off the trunk and help prevent sunscald.  Do this every year.  Another important thing to do in fall is to rake up all fallen leaves, so as to prevent scab disease.   

A serious disease of apples and pears is fireblight.   The symptoms are blackened terminal shoots and leaves, with the ends of the branches often being bent over.  The leaves and twigs will have a scorched look, as if they had been burned.  If you encounter this, it is necessary to carefully prune the branches affected, cutting 6 inches to a foot below the scorched, blackened leaves and stem.  Wipe your lopper/pruner before using and after each cut, with 70% isopropyl alcohol or a 10% bleach solution (1 part bleach in 9 parts water).  Also, prune for fireblight in dry weather.  Wet weather means wet branch wood and a greater chance of spreading the disease.   Seal the cuts with pruning paint. 

Voles and gophers are serious cool season threats to fruit trees, especially young trees.  A tree guard will help protect tender bark from being stripped by voles.  Tree wrap alone will not prevent voles from chewing into bark.  Plastic tree guards are good to use for young trees.  Put them on in September, but be sure to remove them about the time the trees leaf out.   They do not expand well as the tree grows, can become embedded in the growing bark and can cause moisture buildup underneath.  A better tree guard is one of ¼” -1/2” hardware cloth, made at least 4” in diameter and 18”-24” high.  Air can pass through, and the vole/rabbit guard can be left in place until the trunk grows larger. 

FERTILIZING

Fall is an excellent time of year to apply organic fertilizers on established trees as soil is still warm.  Organics activate best when soil temperatures are between 50 degrees and 80 degrees.  Bone meal, alfalfa meal and kelp meal are good dry amendments.  A spray of Neem oil with hydrolyzed fish when leaves are 50-60% fallen will feed the tree, and help prevent fungi and bacterial infestations.   Spray over all branches and the trunk.  Neem is a light, OMRI listed horticultural oil.   

TRANSPLANTING AND PROTECTION

Fall is also a very good time to transplant fruit trees, especially the second half of October into November.  Our weather is very unpredictable and some years we get a deep-freeze winter storm in early November, so really watch the weather to get trees in before winter.  Test your soil pH.  Most fruiting trees and shrubs prefer a soil pH of 6.5-6.9.  Cottonseed Meal is a good organic amendment that will help acidify alkaline soil.  Apples, pears, cherries and plums prefer sandy loam soil.  Gypsum with compost will lighten and improve clay soils.   Dig large holes for your trees and amend poor soils.  Fruit trees need good drainage so avoid planting in swampy, heavy soils.   Do not apply extra fertilizer to newly planted trees, especially chemical fertilizers.    

A new product that protects the tree’s root ball from voles and gophers are Vole King planting baskets made from wire mesh.  If a vole or gopher chews into the mesh, metal wires stick out and poke the vole in the face causing it to stop chewing.   Several sizes of vole baskets are available, from a large fruit tree size down to one made for small bulbs and perennials.  The edges of the baskets roll easily.  A circle of metal hardware cloth will prevent voles from climbing over the edges of the wire basket and digging down into the root ball of the plant. 

In our northern climate, standard apple and pear trees are often best.  Dwarfing rootstocks are not as winter hardy as trees grown on their own roots or grafted onto a hardy standard rootstock.  ‘Antanovka’ is a very winter hardy apple rootstock that produces a standard tree of 15 feet or so in our climate.  The same tree can be pruned to be 10 to 12 feet tall.  Purchased dwarf or semi-dwarf trees can be planted deeper so they will root from above the graft.  This produces a hardy, long-lived tree.  Keep in mind trees grow much larger in areas with longer growing seasons, such as in England, Oregon or California.  Plant standard apple trees in Montana about 18-20 feet apart and standard pears about 20 feet apart.  Good hardy rootstocks for pears are Pyrus communis and Pyrus ussuriensis

AUGUST GARDENING CALENDAR

Standard

FullSizeRender (19)

AUGUST GARDENING CALENDAR

GENERAL

August is often dry and hot, so be sure to water your crops and ornamentals that need irrigation to produce, especially those that must not dry out (primroses, chrysanthemums, etc.).  Pay attention to the timing of harvesting vegetables and cut flowers.  Harvest and dry herbs also.  Collect seed from perennials, shrubs, trees to plant; gather flowers and pods to dry.  Prepare soil and beds for planting lawns, fall bulbs, perennials and roses using organic amendments.   Be sure to bring in house plants when night temperatures drop below 45 degrees.  Apply potash in the form of kelp meal or alfalfa meal mid-month to harden trees and shrubs for winter.  Stop watering garlic, storage onions and shallots in late July or about August first.  The bulbs will need to dry off in the ground for two weeks before digging.  Slow down watering of ripening potatoes when foliage dries.  For long-season winter squashes, pumpkins or melons Pinch off female flowers to hasten ripening before frosts of those set on the vines. 

VEGETABLES

During the first week of August, direct sow spinach, radishes, turnips, peas and lettuce.  In cold frames, greenhouse or under tunnels, sow cabbage and cauliflower for late fall/winter frame crops. 

Other crops that can be sown  and grown on inside a frame or tunnel for extended harvest into winter include: beets, cabbage, Chinese cabbage, chicory, dandelion, kohlrabi, lettuce, mizuna, tatsoi, onions, onion sets, parsley, parsnips, radishes, sorrel, and turnips. 

When harvesting cabbage, cut heads above the bottom leaves at a steep angle to avoid rain or irrigation water rot.  After new cabbage buds appear, thin to 3-4 per plant for a crop of mini cabbages.  Cabbage can be prevented from cracking by withholding water and root pruning on one side or twisting the head ¼ turn.

Harvest onions, garlic and shallots.  Dry them on screens in a shed or garage.  Hang dried bulbs in net or jute bags to keep them dry.  

FLOWERS

This month, direct sow seeds of biennials and early blooming perennials.  Sow bulb seeds.  Transplant seedling perennials out into nursery beds.   Direct sow pansy seed in place for next summer.  Cut back violas selected for division.  Encourage and peg down runners to replace mature violet plants.  Prepare frames to over winter violets to bloom in winter. 

Repot auricula primroses in first week of August; take of offsets and pot up.  Sow fresh auricula seed now, saving half for January/February.  

FRUIT

Tie paper bags loosely over grape clusters to protect from birds. 

TREES, SHRUBS AND ROSES

Do not give any nitrogen to your shrubs, roses and trees as that will cause late soft growth easily damaged by frosts.  It is helpful to apply potash instead, as described above.  In August you can plant lawn seed.  Make sure your soil is raked smooth and roll or stamp the seed in so it will not blow away.  A light mulch of dry grass clippings or pine needles will protect the seed until it germinates.  Water the seeded area three or four times a day for a few minutes each time to keep soil moist.  Usually, grass seed comes up within 10 days. 

GROWING EGGPLANT

Standard

Eggplant New York Improved

GROWING EGGPLANT

Eggplant is not often grown by home gardeners in Western Montana, but a good crop can be harvested and seed saved for next year if you give it what it needs.  Eggplant is native to warm, subtropical regions in India and China where it has been cultivated for more than 6,000 years.  The botanical name of the species is Solanum melongena and it is a member of the plant family Solonaceae , which means it is related to tomatoes, peppers, potatoes and petunias.  I grow eggplant in my USDA Certified Organic garden in the same rotation group as these relatives.  (It is important to rotate your garden crops in family groups so that they are not planted in the same spot for four years or more.  This builds soil and reduces risks of disease and insects.) 

Since eggplant starts growing rather slowly, it should be started inside and transplanted out to the garden later, after danger of frost is past.  I start mine inside under lights about February 1, and grow them on in bright light.  Here in the Mission Valley, our average last frost in spring is about May 17th or so, but of course this can vary by a couple weeks each way in any given year.  Eggplant seed will germinate from 60-95 degrees F., but 75-90 ideal.  The time to germination is 14-21 days.  

Harden off your plants before setting out, giving them more and more time outside each day and more sun, for about a week.  Plant them in full sun.  I usually transplant my started eggplants about May 21 to June 1, unless it is very cold and rainy.  Eggplants will grow well under hoop row covers with open ends, because they really like heat, especially at night.  Your soil pH should be 5.5 to 6.8 for best success.  Set plants about 18 inches apart all ways.  The plants grow best when temperatures are 50–95 degrees, and 70-75 degrees is ideal.   

Protect your young plants from cutworms with jugs or cans or paper rings.  Water your plants regularly, allowing them to get just sub-moist, then water.  In my experience they seem to prefer even moisture.  Try to water early in the day only, allowing leaves to dry before nightfall.  Watch for aphids, their worst pest.  You could use fabric over hoops during summer to prevent insects.  Some other pests that might bother eggplant include: gophers; leafhoppers; cutworms, Colorado potato beetles, flea beetles, mites, stink bugs, nematodes and tomato fruit worms.  Some diseases you might encounter are early blight, late blight, tobacco mosaic, fusarium, and verticillium wilt.  An application of garlic spray early in the season and followed again with the same once a month until autumn will discourage leafhoppers, which carry and continue into fall to prevent curly top. 

To harvest your eggplant, gather when full size, while skin is still shiny and when fruit comes away from the vine easily.  If the skin has turned dull, the seeds are ripening and it is too old, but of course an over-ripe fruit is worth saving for seed for next year).  Check and pick every three days to keep plants producing.  The first eggplants should be ready about September 1.  After harvesting keep the fruit cool, above 55 degrees, in high humidity, and out of the sun.  Fruits last about 7 days. 

A variety that has been successfully grown for seed here in our area is ‘Early Black’ eggplant.  It matures 65 days from transplanting out.  Another good variety is ‘New York Improved’, and heirloom American variety from 1865.  It will be ready to eat in about 75 days from transplanting. 


ORGANIC VEGETABLE GARDENING

Standard

FullSizeRender (20)

ORGANIC VEGETABLE GARDENING

By James Sagmiller

The benefits of gardening organically are many.  First, food grown without dangerous pesticides and herbicides is safe for us and our children to eat.  Second, using organic methods protects our natural environment: soils are healthy, waters are protected from dangerous runoff, insects, birds, and water creatures are all unharmed by dangerous chemicals.  With organic methods, your soil becomes alive with organisms such as mycorrhizal fungi, which, through a symbiotic relationship with plant roots, increase a plant’s ability to uptake moisture and nutrients.  These fungi, along with beneficial soil bacteria, create an ideal, sustainable environment for crops—exactly the opposite of degraded soils exhausted through repeated use of chemical fertilizers. 

At first, planning to “go organic” might seem difficult, but I assure you the rewards are worth the time taken to learn easy ways of gardening organically.  Siting, fencing, and soil building are first steps.  Find a location for your garden that receives full sun, preferably one with wind protection.  If a site is windy, you can put lattice or privacy webbing on your fence to slow down the blast.  Shelter belt plantings of native trees and shrubs are excellent too.  Because deer are so prevalent nowadays, an 8-foot high fence is the best way to shield your garden.  Other methods are less effective.  I made my fence out of game fencing and 10-foot metal posts.  A 6-foot fence that hides what is on the other side will work also; if deer cannot see what is on the other side, they will not leap over.  Deer will eat anything if they are hungry enough! 

A soil test is very helpful before you begin your garden spot.  You can immediately see what nutrients you have in your soil and which ones you need to add more of.  It is also good to know the analysis of purchased soil amendments (marked with the letters N-P-K on fertilizer labels).   For high nitrogen contents (N on the label) choose blood meal, cottonseed meal, alfalfa meal, and composted manure.  Amendments with high phosphorous (P on the label) include fish bone meal and rock phosphate.  Potash (K on the label) is abundant in kelp meal, alfalfa meal and wood ashes.  Keep in mind wood ashes and bone meal become alkaline (higher pH) as they decompose, and cottonseed meal becomes more acidic (lower pH).  It is helpful to have a test kit and know your soil’s pH and NPK content.  Nitrogen promotes good green growth, phosphorous promotes flowering and fruiting, and potash encourages root growth and ripening of fruits and seeds.

To kill out grass and weeds for a new garden spot, use something safe that will shade the ground.  Some options are: landscape fabric with weights on it, newspaper covered with moist, heavy organic straw, or black plastic weighted down.  It takes a few weeks to kill out most plant material, but some perennial weeds will remain and seeds will sprout again.  If you are planning well ahead, you can immediately plant a soil-building cover crop to shade the soil until you plant vegetables.  If you need to start right away, till the soil, add organic amendments, plant your seeds and transplants, then mulch. 

When you plant seeds, choose organically certified seed if possible, especially for food plants.  Heirloom seed varieties, which are all open-pollinated, are excellent for organic gardening, because being generations-old, they are well-adapted to climates where they have been grown for a long time.  Heirlooms often ripen in succession rather than all at once, frequently are more nutritious, have exceptional taste, and seed can be saved from them to plant next year.  Another plus is that many heirloom varieties were developed to last well in storage—a valuable trait for local sustainability and for gardeners who want to be self-sufficient.

Mulching your garden is important to conserve moisture and provide for living soil organisms.  Landscape fabric, organic straw, compost, or composted grass clippings work well.  (Fresh grass clippings or other fresh greens will draw nitrogen out of the soil rather than add nitrogen.) 

Be sure to include a home for pollinators in or around your garden.  Native wildflowers are best; they will attract and foster native species of bees and other insects.  Another effective tactic is to release ladybugs, lacewings, praying mantises and other pest-eating bugs in your garden at proper times.  It is helpful to provide bird, bat houses and Mason bee houses.

Most gardeners new to organic gardening have anxiety about controlling pests and diseases.  Healthy, thriving plants, combined with preventative methods are the most effective ways to begin.  A diversity of crops will help confuse damaging insects (the scent of marigolds, for example confuses some pests).  Crop-rotation will prevent a host of pest and disease problems.  Plan your vegetable layout so that the same kind of plant is not grown in the same spot for at least 4 years.  Collars made from toilet paper rolls or plastic cups will deter cut worms.  Netting will prevent birds from eating strawberries.  Light insect fabric on row covers will protect all cole crops from cabbage loopers; and straw mulch around tomatoes will make a home for beetles, which will eat aphids off the tomatoes at night.  Garlic spray over your vegetables will confuse most damaging pests and prevent infestations if timed at monthly intervals.  Safe pesticides and fungicides, such as BT, horticultural oil, neem oil, insecticidal soap, pyrethrum, and diatomaceous earth are each effective for certain listed pests.  Always follow directions and precautions to the letter with any pesticides or herbicides. 

Take advantage of the latest technologies to assist your organic garden.  A few of these include: season-extending high or low tunnels, solar-powered heating and cooling, and frost-protection fabrics.  Using tunnels and row covers can improve yields significantly because you get a month to 6 weeks longer season of growing and harvesting!  Automatic solar vents for cold frames, greenhouses and high tunnels will save you labor and worry—especially in our volatile climate, with its ups and downs in temperature, alternating clouds and sunshine, and sudden winds that occur in a typical Montana spring.  Solar powered fans will kick on automatically when the temperature gets too high in a tunnel or greenhouse, and will not contribute to the overabundance of carbon dioxide in our atmosphere.  I wish you the best of luck and success in your organic gardening!