A RECONSTRUCTED HUERTA FOR MISSION SAN FERNANDO REY DE ESPANA

Standard

IMG_6605IMG_6601IMG_6597IMG_6596IMG_6592

A RECONSTRUCTED HUERTA FOR

MISSION SAN FERNANDO REY DE ESPANA

SAN FERNANDO, CALIFORNIA, FOUNDED 1797

By James J. Sagmiller


HISTORY

During the period of Spanish exploration of North America (1542-1769) and the Spanish Colonial period (1769-1821) the area we presently call California was known as “Alta California,” which translates to “Upper California.” Baja California, or “Lower California” retains its original name today. The policy of the Spanish crown was to establish Catholic missions to convert native peoples and exploit them for labor. Priests were sent out in pairs, usually with regional support of the military. The first successful, permanent mission in the area was founded in Baja California: Mission Nuestra Senora de Loreto Concho, on Oct. 9, 1697 by Jesuit priests. The king of Spain expelled all the Jesuits in 1768, responding to rumors they had become too powerful. The Jesuits were replaced by Franciscan friars who, as part of the philosophy of their order, are required to take a vow of poverty. Around this time, the Spanish crown decided to establish missions and develop ports in Alta California. Mission San Diego Alcala was the first of these, founded July 16, 1769.

FOUNDING THE MISSION

Several criteria were important for a successful mission: fertile soil, water available for irrigation and drinking, standing timber for building, and a native population that could be converted to Christianity and used for labor.

Mission San Fernando Rey de Espana was founded September 8, 1797 by Padre Fermin Fransisco de Lasuen. It was the seventeenth of the missions founded in Alta California. A man named Francisco Reyes already had a ranch at the site of the mission and it was worked with Native American labor. He decided to donated his land to the church. At an elevation of 1,100 ft., with reliable spring water, a mild coastal climate and twelve inches of rain a year, this was an excellent place to start a mission. The native population originally were hunter gatherers who exploited the rich flora and fauna of the area. Several tribal groups lived nearby, but the two most numerous were the Gabrielino and Tataviam Indians.

THE SITE

The site plan of Mission San Fernando Rey de Espana was of a design typical for Spanish missions. The main focus of the mission complex was the chapel, with its rectangular central nave with altar, and a bell tower adjacent. Other buildings, mostly workshops, were arranged in the pattern of a quadrangle around a large patio (now known as the East Garden).  A soldier’s quarters were located behind, next to the chapel, and a cemetery to the north. A building designed as priest’s quarters and for guest lodgers was the well-known and much-photographed structure with an arched arcade known as the “convento.” The arrangement of buildings in the compound was designed for efficiency but also for protection from bandits, wild animals, and livestock. Irrigated gardens benefited from this protection and were convenient to the kitchen.

The buildings at the mission were built of adobe bricks, made from a mixture of mud and straw and had very thick walls made to support heavy beams and tile roofs. Pine logs were used for beams and the rafters made from sycamore. Eaves were very wide, to protect the adobe from rain.

ECONOMICS OF THE MISSION

The mission was, of necessity, primarily self-sufficient. Natives were trained in many trades, including: blacksmithing, farming, ranching, carpentry, weaving, leather-making, brick-making, and soap-making. Wine was made from grapes and olive oil as well. By 1804, 1,000 Native Americans lived and worked at Mission San Fernando Rey, producing hides, fine leatherwork, tallow, soap, cloth, and wine as well as all the crops needed to support so many. By 1819 there were 12,800 cattle, 7,800 sheep, 176 goats, 45 pigs, 144 mules, 780 horses. The mission was a popular resting place for travelers on El Camino Real (the Royal Road).

HISTORIC MISSION GARDEN

Every mission had to produce as much food as possible to feed its large labor force and create a reserve to act as insurance for famine. Each of the missions planned extensive gardens. These gardens were not the primarily ornamental ones we see today at the missions, but were subsistence gardens of vegetables, fruit, herbs and flowers, all grown together. A garden of this type was referred to as a “huerta.” A literal translation would be “orchard garden.” These gardens looked quite different than modern gardens. They had geometric beds set into dirt or gravel paths, filled with plants grown together in a practical fashion, watered by flood irrigation from “acequias,” small irrigation ditches of gravity-fed water. There was no lawn grass. Everything grown was used for some purpose, such as for food, medicine, dye, cosmetics, wine, or oil.

MISSION GARDENS TODAY

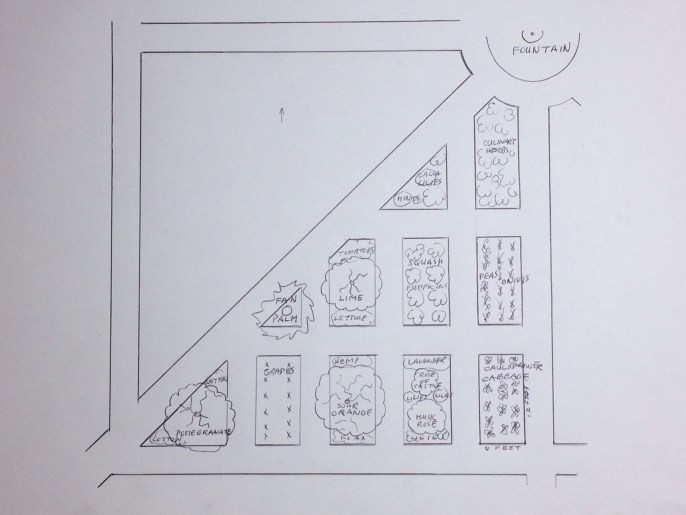
An early photograph shows the East Garden in a ruined state before the workshop buildings were reconstructed. A fountain was originally in the center of the garden, but it was moved about 30 feet to the west and the original design of the garden obliterated as the workshop buildings were rebuilt. What we see now in the East Garden are cement paths set into grass, with various hedges and shrubs, and olive, pine and palm trees. I am presenting here a design for the reconstruction of the huerta that originally occupied the space that is now the East garden, as it might have appeared circa 1804.

A RECONSTRUCTION OF THE EAST GARDEN

In my design for a reconstructed huerta at the mission, the fountain would be returned to the center of the design, with paths leading in four directions from the fountain as well as a path to each of the four corners of the quadrangle. All lawn grass would be removed, and original gravity-fed irrigation ditches, called “acequias,” would be reconstructed as well. The mature olive, palm and pine trees would be left in place, as the use of those species were very much a part of original plantings at the 1797 mission. Paths would be made of ¼ inch gravel and geometric beds would be flood irrigated just as they originally were. Every effort would be made to source seeds and cuttings of original plants known to have been grown at the California missions in the late eighteenth and early nineteenth centuries. Plants requiring irrigation were the most likely candidates to be grown in the huerta, such as fruits, flowers and vegetables.

HISTORIC PLANTS GROWN AT THE MISSIONS

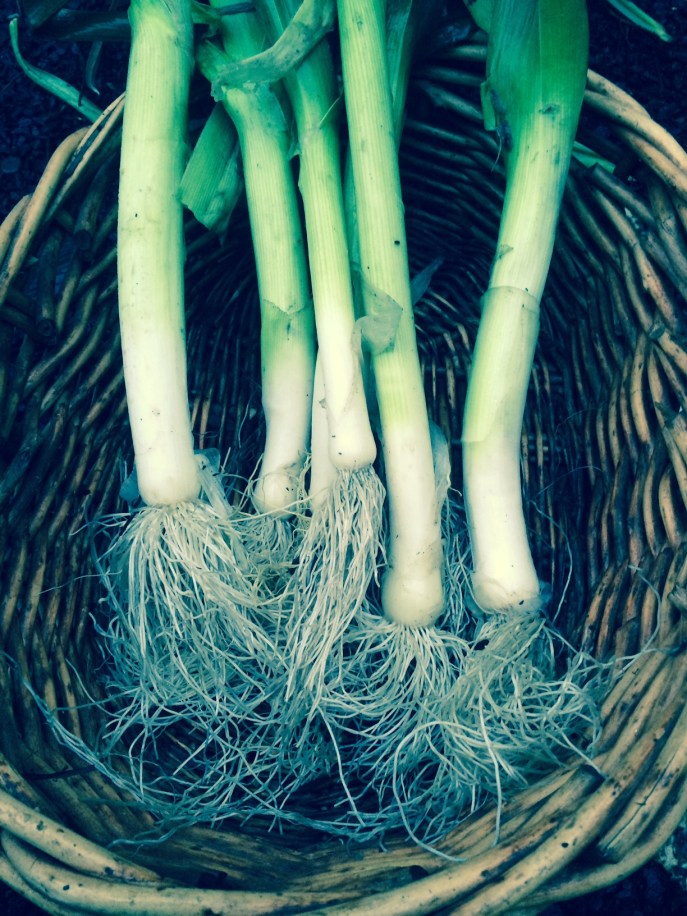
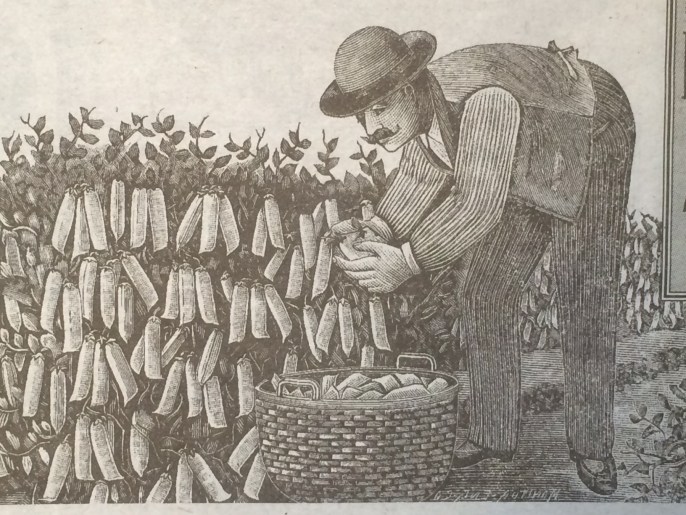
Wheat, corn (maize) and barley were grown at Mission San Fernando Rey, but most probably in outer fields or dryland farmed.  Vegetables that were probably grown in the irrigated huerta and appearing on mission records include: peas, beans, fava beans, cabbage, lettuce, asparagus, onions, tomatoes and chili peppers. Several fruits were grown at the mission: oranges, melons, pears, grapes, pomegranates, apples, quinces, plums, peaches, apricots, figs, olives, avocados and watermelons. Wild plants were also used at the mission. Presumably the Native Americans introduced the padres to them, for they are an excellent, readily available food source. Wild plants and seeds known to have been used at the mission are: chia (Salvia hispanica), sunflowers, acorns, pine nuts, sage, tunas (the fruit of Opuntia spp. cacti), clover, screw beans (mesquite; Prosopis spp.), “nopales” (leaves of Opuntia spp. Cacti) and agave. The chia was probably brought from Mexico.

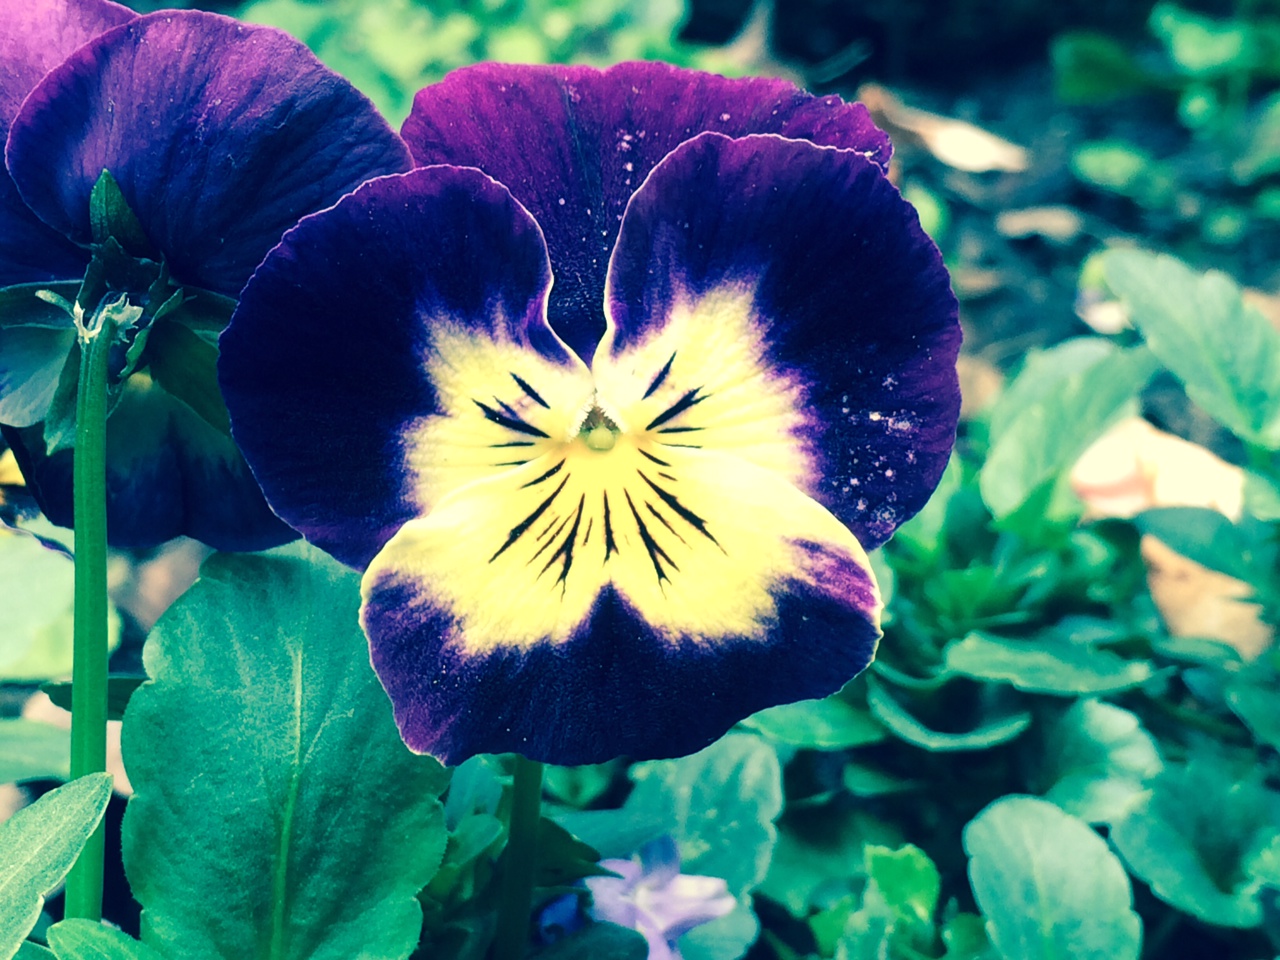
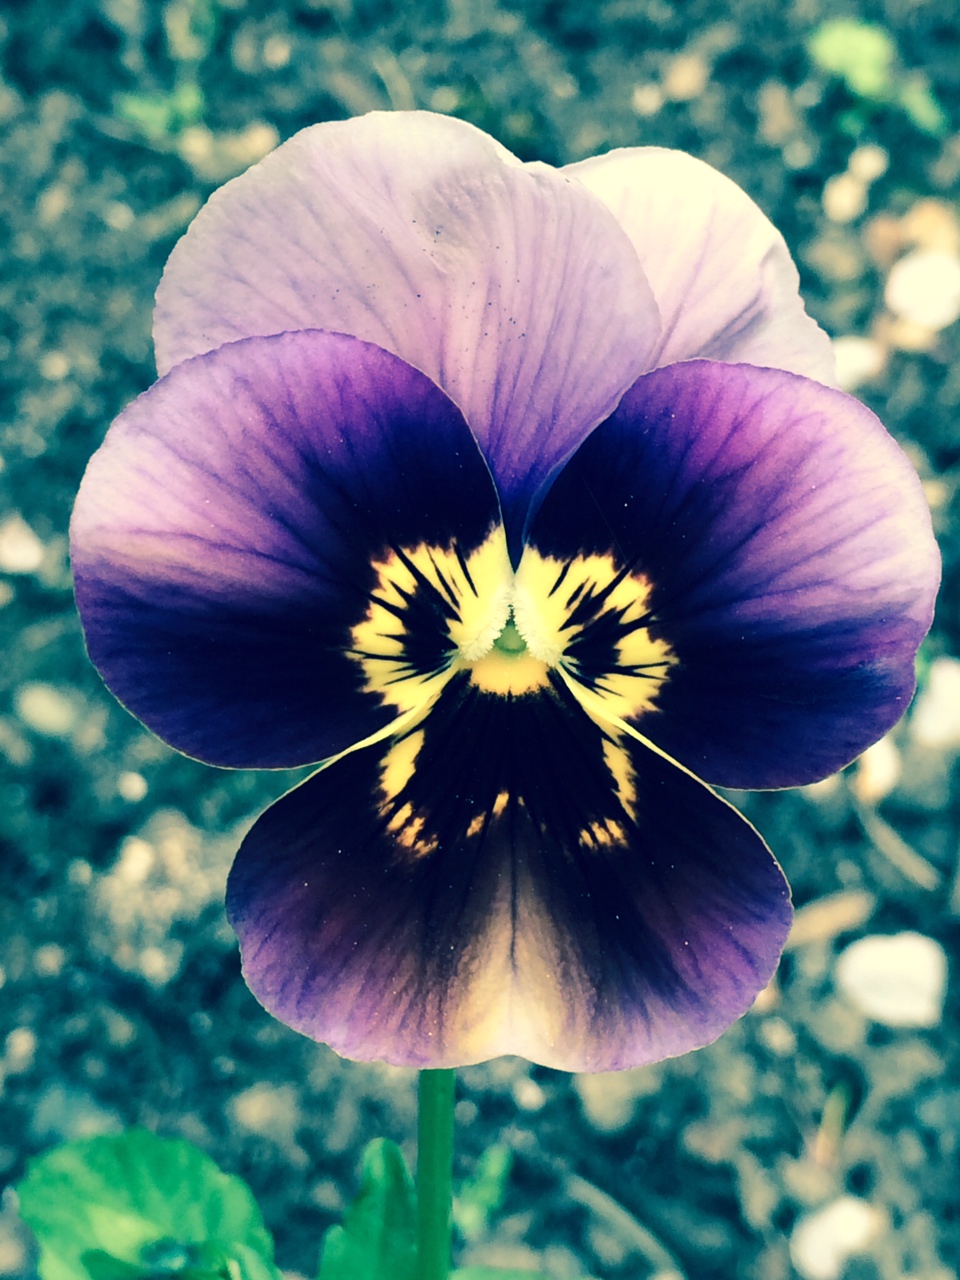
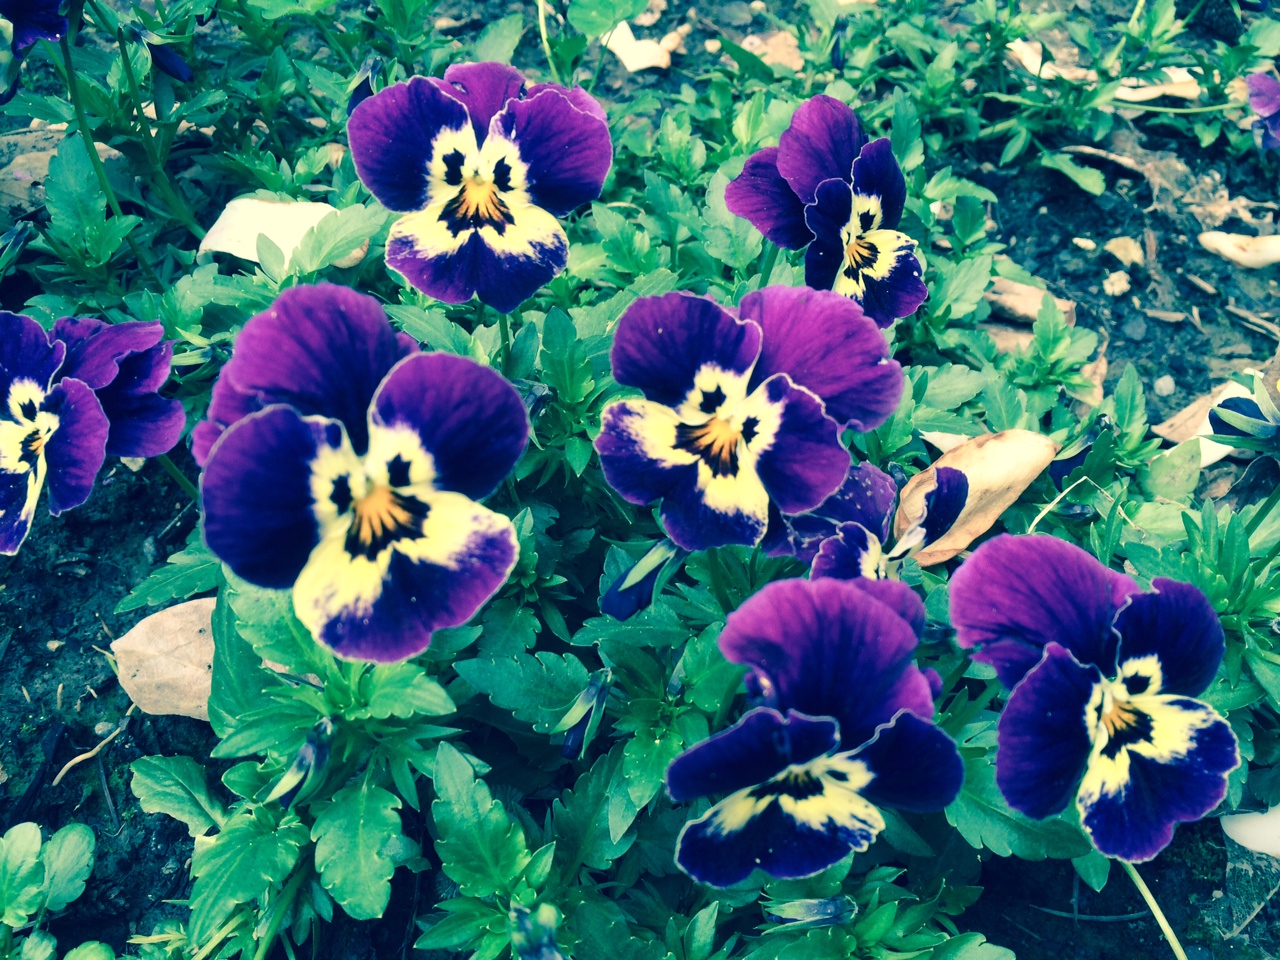
In a reconstruction of a huerta for Mission San Fernando Rey it was advantageous to consult historic documents from other, contemporary California missions. Records from Mission San Diego dated 1769, reveal that corn (maize), cauliflower, lentils and garlic were grown there. By the 1770s grapes, barley, wheat, lettuce, figs, peppers, squash and pumpkins were grown. By the 1790s, records show that apples, pomegranates, oranges were grown as well. Herbs grown at Mission Santa Barbara included: anise, basil, borage, cilantro, cumin, dill, epazote (Dysphania ambrosioides), horehound, lavender, mint, rosemary, sage, thyme, and valerian. Father Junipero Serra brought the castor oil plant to Mission San Diego in 1769 and the plant was used for its oil. Other early introductions grown at many of the missions (Padilla 1962; Streatfield, 1994) were: calla lilies, Madonna lilies (Lilium candidum), the Castilian rose (Rosa x damascena bifera), the musk rose (Rosa moschata), jasmine, pennyroyal, wild cherry (Prunus illicifolia), Peruvian pepper tree (Schinus molle), matilija poppy (Romneya coulteri), date palm Phoenix dactylifera), Canary Island date palm (Phoenix canariensis), Mexican fan palm (Washingtonia robusta) and native fan palm (Washingtonia filifera).

Utilitarian plants known to have been grown at most of the missions include: agave, cotton, flax and hemp—all used for fiber. Teasel was used for making combs to card wool. Indigo was grown for dye and palm fronds were used for roof thatching and for making brooms. The giant reed (Arundo donax) was used in ramadas to provide slatted shade. Gourds were raised to be cured and carved into bowls and spoons and cat’s claw acacia and Peruvian pepper tree were used for glue.

At Mission Santa Barbara, Tina Foss, Curator of the mission museum and Jerry Sortomme, Professor Emeritus of Santa Barbara City College have been actively restoring a huerta in the mission grounds. They have sourced several plants that can be traced to one or another of the early mission gardens. A cutting from a grape plant known to more than one hundred years old from Gypsy Canyon Winery was tested for DNA. The plant was shown through the tests to be the original ‘Mission Grape’ (known as the ‘Criolla Chica’ in Argentina,’ ‘Negra Corriente’ in Peru, and ‘Pais’ in Chile; Robinson, 1999). Another (untested) grape cutting was obtained from San Ignacio Mission in Baja California from a grape vine known to be more than 250 years old, thus dating from the time of the establishment of the missions.  Ancient cuttings of pear trees from La Purisima Mission in Baja (circa 1800) and from Rio Hondo may prove be the original pear variety ‘Padre.’

Some varieties of vegetables originally grown at the missions in the late 1700s and early 1800s are still available in commerce, and some might be sourced from other historic collections. Most of the herbs are still available; several old varieties of beans, squash and maize are still to be found, as well as lettuces, gourds, melons and chili peppers. Very few peas, carrots, cabbage, cauliflower, onions, and tomatoes have survived; however, I have sourced at least one late eighteenth or early nineteenth century variety of each of these.

DRAWINGS OF CURRENT GARDEN AND A HISTORIC RECONSTRUCTED HUERTA

The drawings I have made show: first, the original layout of structures at the mission, taken from drawings made in a survey of the site in 1933. The second drawing shows the current, historically inaccurate East Garden with cement paths, grass and the fountain moved about 30 feet east of its original location. Third, my plan for the reconstructed huerta, showing overall design of paths and beds, with the fountain restored to its central location. My fourth drawing shows a detail of one of the beds with mixed vegetables, fruit, herbs and flowers, typical of the late eighteenth-early nineteenth century Spanish Colonial style. Existing large olive, palm and pine trees have been retained as part of the reconstructed design. The fifth illustration is a watercolor painting showing what the restored huerta would look like.

BIBLIOGRAPHY

AthanasiusSchafer.com. Mission San Fernando Rey de Espana.

Glybok, Shirley, 1972. The Art of the Spanish in the United States and Puerto Rico. NY:                  McMillan.

Brenzel, Katherine, Ed. 2001. Sunset Western Garden Book. Sunset Publishing, Menlo Park, CA.

Hayes, Virgina, Jan. 23, 2007. “A Huerta for Mission Santa Barbara” Santa Barbara Independent.

Padilla, Victoria, 1961. Southern California Gardens. Los Angeles: University of Caliifornia Press.

Los Angeles County Library.org. Mission San Fernando.

Rivera, Jose A and Thomas F. Glick, 2003. Local Control and Discretionary Authority: Protecting     the Acequia Bordo. From a paper presented at the 51st Congreso Internacional de Americanistas,         Santiago Chile, July 14-18, 2003.

Robinson, Jancis, Ed., 1999. The Oxford Companion to Wine. NY: Oxford University Press.

Streatfield, David C., 1994. California Gardens: Creativity and a New Eden. New York: Abbeville     Press.


RECREATING A HISTORIC GARDEN

Standard

IMG_6496

RECREATING A HISTORIC GARDEN 

By James J. Sagmiller 

Every state in our nation has a number of historic sites.  The oldest are locations of Native American habitation dating to times before the Colonial Period—these are termed “prehistoric” rather than “historic.”  In order to recreate or restore a very early Native American garden, researchers must rely on archaeological evidence and oral traditions to determine what was grown and how it was grown. One such example is the Kipahulu Living Farm in Hana, Hawaii.  Plants grown in Hawaii by Native peoples prior to the arrival of Captain Cook in 1778 have been collected and preserved at this garden. Gardens like this are a fascinating, educational experience to visit.  Anyone seeking to recreate or restore a garden from the Colonial Period or later would be able to consult written records of various types as well as archaeology and oral traditions.   

The United States National Park Service has developed methods and techniques for the preservation, restoration, reconstruction and rehabilitation of the gardens and architecture of historic gardens.  Charles Birnbaum ((1996) has written a book for the National Park Service outlining four defining methods of approach to restoring and recreating a historic garden.  In the approach of preservation, nothing is added or taken away from the garden; what is there is protected and preserved for the future.  The William Gibbes House garden in Charleston, S.C., designed by Loutrel Biggs in 1929, has been carefully preserved in its original form to the present day.  A second approach is restoration, in which a garden is made to accurately reflect the landscape at a specific time period of historical significance. The Borroughs Plantation in Hardy, Virginia (where Booker T. Washington lived as a slave around 1860) is a good example of the restoration of a living historic farm.  Reconstruction recreates a garden or part of a garden that has since disappeared, except perhaps for the knowledge of where it was located.  This has been done at Mission Santa Barbara, Santa Barbara, CA., where the historic mission huertaor orchard garden, has been reconstructed using cuttings and seeds of plants grown at the mission in the late eighteenth century.  A fourth and final approach to a historic garden is rehabilitation, which brings elements from the past history of the site and applies them to a new use of the property—an adaptation to its use in a new way. This has been done in many places in the U.S., such as in Monterey, California where private businesses have been allowed to occupy as well as preserve historic buildings and gardens.    

There are several research processes we can undertake to restore or recreate a period garden around a private dwelling or a national historic site.  The site should be surveyed, that is measured and carefully studied.  If possible, the garden should be observed over the period of several months to a year to take note of plants that may be dormant, or not visible part of the season.  An example might be spring-flowering bulbs that appear in March, go dormant and disappear by the end of May.  The site might be studied for architectural features such as remains or indications of paths, walls, fences, fountains, irrigation ditches, and the layout of beds.  Lawn grass may grow shorter over buried paving, paths, or fallen walls.   

Early engravings, photographs or postcards are invaluable for reconstructing historic gardens to a specific time in the past.  Occasionally, newspaper clippings, garden plans and/or plant lists are available as well.  During the 1870s many counties in the U.S. published atlases of important residences in their area.  These can be extremely useful in reconstructing a garden of that time period.   

Old herbals and antique catalogs can be consulted to identify plants still existing on heritage sites.  The style of the building(s) on the property will lend information to the period of the garden, or plants still remaining after buildings have disappeared can be studied and placed in historic context.  Rose or peony plants are frequently easier to identify than old perennials, because of the greater amount of contemporary information available.  The practice of ordering plants through the mail became common after about 1850, so old nursery and seed catalogs are valuable in determining what was obtainable. Period gardening and landscaping books will inform how plants were used and often include garden plans or designs.   

It is important to recognize that gardening styles as well as the purposes and use of gardens has changed and continues to change as time passes.  California mission gardens were created for subsistence—that is, for food (grains, vegetables and fruit) and for all the materials needed for medicine, the manufacture of trade goods and fodder for livestock.  The few ornamentals included were probably used for decoration of the altar, quite unlike the gardens we see at most of the missions today, which are strictly ornamental.  A historic garden that is recreated as living history would necessarily require a good deal of research and should be maintained with the tools and techniques of the specific time period it represents. A historic garden made for a period property and lived in by a modern family could be more easily maintained with modern tools and techniques, though an approach using organic methods would be both more in keeping with historic practices and better for the planet. 

Present day organic methods are not necessarily historic, though the use of chemicals did not begin until the late 1800s.  Nicotine was used as a pesticide from the mid-nineteenth century, and Bordeaux Mixture (copper sulfate) as a fungicide around the same period.  The great increase in the use of garden chemicals began in the 1940s and so is not really a significant element in garden care before that time.   

In the coming weeks I will present some research designs for several historic gardens of various time periods, including plant lists, site plans, and maintenance techniques.       


NATIVE AMERICAN HEIRLOOM VEGETABLES

Standard

NATIVE AMERICAN VEGETABLES

It is an interesting fact that some of our most popular vegetables are from the North and South American continents.  These include: beans, corn (maize), squash, sunflowers, amaranth, chili peppers, tomatoes, tomatillos, and quinoa.  All are plants originally found in the wild, brought into cultivation by Native American peoples.  This process, known as domestication, began nearly 8,000 years ago and still continues today.  Each growing season, people selected the most flavorful, productive, largest and best-adapted vegetables to eat and to save seed from.  Many tribal groups all over the Americas are still growing and saving seed each year.  Corn, or maize, as it is properly known, began as a wild grass in central Mexico.  The oldest cobs, from archaeological sites dating to 6,750 years ago were tiny—only about one inch long!  By 1492 six different classes (basic types) of maize had been developed; popcorn, flint, pod corn, flour, dent, and sweet corn, with cob sizes up to 15 inches.  The same activity of selecting the best of the best was undertaken for each of the vegetables listed above.

It can be seen from the list that without exception, all these plants are tropical or subtropical in origin.  People who lived in the north, or at higher elevations as we do, needed varieties that would mature earlier, in time for harvest and storage.   By gradually selecting for early maturity season after season, these crops could be grown in areas with shorter and cooler seasons.  The Mandan and Hidatsa in the Dakotas developed early varieties of beans, corn, squash and sunflowers.  In the American Southwest the Hopi, San Filipe Pueblo group, Taos Pueblo group and others at high elevations developed early strains as well.  Early-maturing types of quinoa, tomatoes, amaranth, maize and chilies were developed in the high mountains of Central America and the Andes Mountains.

In our local area, Western Montana, we are fortunate to be able to grow a number of heirloom vegetables from various tribes living in short season areas.  I grow over 30 different varieties of these vegetables here in Ronan.  Some are quite rare now and we need to preserve them.  An advantage is that growing them here season after season will result in locally-adapted strains.  All of these traditional Native American vegetables are open-pollinated, so seed can be saved from year to year.   Of course, these are not hybrids, nor are they GMO strains.  However, caution must be observed in seed-saving.  Maize is wind-pollinated, so each variety must be isolated from other maize varieties to remain pure and prevent pollination by GMO or other strains of maize.  You need to grow more than 200 plants of maize each year to avoid inbreeding depression, which results in infertility and non-viable or no seed.

In my garden I have had good luck maturing Hidatsa beans, San Filipe chilies, yellow and white Scallop summer squash, Crookneck winter squash, Navajo and Long Pie pumpkins, and Hopi Dye sunflowers.  Next year I am planning a much larger garden and will test more varieties.

Some of the virtues of heirloom Native American vegetables are that they are adapted to the American climate, store well, are open-pollinated, easy to grow organically and resistant to pests and diseases.  Another important factor to remember is that vegetables are very healthy for the body and much superior to the packaged, additive-laden food so popular today.  A diet rich in vegetables can also reduce the instance of diabetes and other diseases.

We have some pictures below of some Native American vegetables adapted to shorter growing seasons.  The maize is Hopi Blue flour, the squash is an heirloom from the Ute tribe, the beans are Zuni Gold and the sunflower is the rare Hopi Dye sunflower.

SAVING SEEDS FROM YOUR GARDEN

Standard

fullsizerender-3


An excellent way to preserve a favorite vegetable variety is to harvest and save the seed from your own garden plants.  This can be done with all open-pollinated (non-hybrid) vegetables.  Hybrids are pollinated by humans for a specific resulting plant.  (Seeds saved from hybrids will not produce the same fruit or vegetable you grew.)  Many rare, open-pollinated heirloom vegetables and flowers have been saved and passed down for generations.  Some Native American kinds of squash, corn, beans and sunflowers have been passed down by various tribes for over a thousand years!  Several heirloom kinds of lettuce, peppers, pumpkins, squash, tomatoes and other vegetables still exist from Colonial and Victorian times.

Locally adapted varieties will be the most successful and productive.  You will need to save about 100 to 150 seeds of each cultivar you want to save.  Some easy vegetables to begin with are tomatoes, beans, peas, and lettuce, which are all self-pollinating and easier to keep true to type; they can also be cross-pollinated.  Other vegetables need to be cross-pollinated to produce seed and will cross with other nearby plants of the same genus or species.  Each variety needs to be isolated so it will remain true to type.

Isolation may be accomplished by distance; staggering maturity dates; by caging, or bagging.  For most vegetables 200 feet of distance is enough to retain genetic purity, but some, such as corn, need a mile or more.  Staggering maturity might be accomplished by planting two strains of corn, one maturing at 65 days and another at 80-85 days.  Pollination of the early variety will be finished by the time the later one is ready to pollinate.  Cages can be built and covered with row cover fabric to isolate radishes, beets, turnips, carrots, parsnips and onions.  A bait of honey spread upon a plate will attract bees into an uncovered cage.  When about 15 bees are present, cover the cage for an hour or two; release the bees before sunset. There are three species of squashes and pumpkins commonly grown so you must research this if you want to keep your strain pure.  Corn, squash and pumpkins can be hand-pollinated if bagged.

In the garden, give plants grown for seed more space to accommodate tall seed stalks.  Select the most healthy, robust plants to save seed from.  The fruit should be riper than that used for eating.  Usually fruit will turn yellow, soften and sometimes even begin to rot before seeds are mature.  Pea seed turns green or yellow; beets, beans and watermelon seeds darken; peppers and squash seeds are usually white, and corn seed (especially sweet corn) will dent and shrivel.

To process seed for storage, remove pulp, juice or flesh and dry the seeds on a fine screen because seeds will stick to paper or cloth.  A float test will show viable seeds.  Those that float will not grow.  Dry the seeds to about 10% moisture before storing away in glass jars with metal lids.  Glass jars are the best way to keep out humidity, which might cause your seeds to sprout and die in storage.  A cool, dry place is best for storage, or you may place the jars in the refrigerator.  Label your seeds carefully to keep good records.

SEPTEMBER GARDENING CALENDAR

Standard

IMG_0667

SEPTEMBER GARDENING CALENDAR

GENERAL

Harvest beans and other crops; remove blossoms from eggplant and peppers to ripen remaining fruits.  Cover sunflowers from birds, pinch tomato tips.  Lay down grass turf.  Watch for slugs and snails, cultivate to destroy grasshopper eggs.  Also, watch for corn earworms.

VEGETABLES

Cultivate or hoe around cabbage, cauliflower, broccoli, turnips and celery.  Keep late maturing cauliflower and broccoli well-watered.  Transplant out starts of endive the first week of September.  Plant garlic and shallots and over-wintering onion sets.  Direct seed outside: arugula, lettuce, radishes, cress, corn salad, chervil and kale.

If you plan to grow crops under tunnels or in a cold greenhouse over the winter, plant seed (early in the month) of crops for winter use: chervil, kale, spinach, lettuce, radishes, corn salad, and winter cress.  Later in the month, from the 20th to the first week of October, plant seeds of cabbage, cauliflower and other brassicas for transplanting out into tunnels in OctoberHave winter cover ready by October 1.

Make beds for growing mushrooms.  Well-rotted horse manure is excellent for mushroom beds.

Gather ripe seeds of any vegetables (or flowers) you want to save seed from.

Watch outdoor temperatures and bring in house plants if frost threatens.

FLOWERS

Prepare beds for planting bulbs.  Sow seeds of bulbous flowers collected in summer.  Take cuttings of violets and pansies; plant cuttings out in early spring.  Transplant peonies and lilies.  Dig dahlias after killing frost.  Transplant pinks and carnations with root ball intact late in the month.  Late in the month, plant out perennials and biennials where they are to bloom.  Also, most perennials can be divided now and replanted where they are to bloom.


FRUIT

Gather ripe fruit from apples and pears.  Remove diseased fruits and “mummies”, rake up leaves under fruit trees and destroy them (to prevent apple scab).  Prepare equipment to make cider.  Finish budding apples.  Prepare beds for planting fruit trees, using well-rotted manure, digging down 18 inches.  Take cuttings or make layers of gooseberries, currants, honeysuckle, and other trees and shrubs.  Plant seeds of fruit trees: cherry, plum, apricot, apple, pear, etc.

Keep strawberries free of weeds and the soil moist.  If you plan to force strawberries in winter, now is the time to take them up and pot them.  Cut a root ball out with a knife, trim off dead leaves and runners and pot into 7 or 8 inch pots.  Place them in shade and water well.  Then plunge the pots in earth up to the rim.  Take them up and into frames or greenhouse before cold weather.

Protect ripening grapes from birds with netting or gauze; keep weeds away from plants.  If wasps are a problem, hang containers of sugar water to catch them.  Prepare to make wine if desired.

TREES, SHRUBS AND ROSES

Trim branches of evergreens and walnut trees, so wounds will heal before winter.  Keep weeds cleaned out from nursery beds and plantings of young trees.


Standard

AURICULA PRIMROSES

When we think of primroses, the first thing that comes to mind are the ‘Pacific Giant’ hybrid primroses we see in garden centers.  Actually hundreds of species of Primula are in existence, and some species have been brought into gardens and significantly developed.  The auricula primroses, members of the species P. auricula, have been grown in gardens since the 1500s.  They have evergreen leaves that curl around in a way that resembles the ear of a bear.  When first cultivated, they were called ‘Bear’s Ears’.  Charles l’Ecluse (known as Clusius) is the first person known to have grown auriculas in a garden.  This was after 1573; he grew two kinds.  The first auriculas grown in England are illustrated first left above, in a woodcut from Gerard’s Great Herbal of 1596.  By 1639, at least 15 different colors and even striped forms were grown.  Auriculas were a popular plant beginning in the early eighteenth century when keen collectors began to grow and exhibit them in competitions.  These growers were called ‘florists’.  Several specialized classes of auriculas came into existence over the following centuries.  Potted plants were (and still are) exhibited in flower on black painted shelves in a stage-like display.  The black background highlights the beautiful colors of the flowers.  Auriculas do have an extremely wide color range, much greater than practically every other kind of flower.  The second picture shows a tawny-colored auricula, a color popular in the 1600s.  Auriculas were extremely popular in the nineteenth century, but curiously, are not well-known today.

Auriculas are native to the Alps and prefer gritty, moist, well-drained soil with a good amount of humus.  They are tolerant of alkalinity and extremely winter hardy to USDA climate zone 3, or even zone 2 if covered with snow all winter.  This means they are perfectly suited to growing all over Montana.  They are shade plants, especially when grown at lower altitudes.  The individual plants are small, only about 8 to 12 inches tall when blooming.  The engraving third from left depicts a garden auricula from 1908.  A gardener must watch that vigorous neighboring plants do not overtake them.  Being evergreen, they grow rather slowly.  I found that a mulch of sharp grit, about the diameter of turkey grit, is excellent for them and will discourage slugs.  Auriculas thrive when grown organically and enjoy soil amendments such as bone meal, composted manure, kelp meal, wood ashes, and grit for excellent drainage.

The classes of exhibition auriculas are usually grown in pots and are smaller and less vigorous than garden auriculas.  The pots used to grow them are taller than average, as the plants have a long tap root.  Growers commonly use an organic soil potting mix with added grit, bone meal and wood ashes.  Grit is especially important for drainage, but also for itsmineral content.  Indeed, the flowers have a wonderful mineral-floral fragrance unlike any other.  The last picture above shows a double exhibition auricula.

Auriculas are available from specialist growers as plants or seed.  I grow mine from seed planted in a fine, fast-draining seedling mix, covered with glass and placed in a shaded cold frame.  I plant seeds in late fall or winter, so the seeds have a cold period before they sprout in the spring.  The plants are usually large enough to pot on by midsummer.  Mature plants are best divided  midsummer.  I would urge gardeners to try auriculas; they are beautiful and rewarding to grow.  If grown in the garden, they might be best appreciated in raised beds, where their delicate flowers can be observed.

SOIL PH FOR GROWING VEGETABLES

Standard

FullSizeRender


Soil pH is a measure of acidity or alkalinity.  This measurement can range from a very low pH of 1.0 to an extremely high pH of 14.0.  7.0 is considered neutral and several vegetables will thrive in soil with a neutral pH.  Some vegetables do prefer a more acidic soil while others prefer a more alkaline soil.  Fortunately most will grow and produce well in a pH range of 5.5 to 7.5.   Areas with high rainfall, such as coastal Washington, tend to have acidic soils high in organic matter, while areas with lower rainfall, such as most of the mountain valleys in Montana, tend to have alkaline soils low in organic matter.  Here in the valleys of the Flathead region, where most of us garden, soils tend to be somewhat to highly alkaline.

Before you amend your existing soil to plant vegetables it is a good idea to test the pH.  An easy way is to purchase a test kit.  Most of them are easy to use and give fairly accurate readings.  Your county extension agent can do a soil test also.  Once you have determined your soil pH and which crops you intend to grow, you can amend your garden soil.  Adding lime will increase pH and make acidic soils more alkaline; adding sulfur will lower pH and make soils more acidic.  Organic matter usually helps reduce alkalinity.  Aged manure, pine needles, compost and coir dust are a few amendments that will help do this while they improve soil structure and encourage beneficial soil micro-organisms.  If your garden is divided into separate beds or raised beds, it is easier to adjust the soil in each bed for what you plan to grow.   I rotate my vegetable crops in a four-year rotation plan, so I try to keep a basic soil pH around 6.0 to 6.5.  This way I can grow almost every vegetable, but I slightly adjust pH each year before growing a particular plant.  For example, I add sulfur before growing potatoes.  Conversely, I add a small amount of lime before planting any of the Brassica family (Broccoli, Brussels sprouts, cauliflower, etc.).   Having soil pH correct for each crop will reduce pest and disease problems as well as increase yields.

Here is a listing of pH tolerance ranges for specific vegetables.  (The optimum pH for each is usually the median between the two extremes.)  I have listed vegetables preferring more acidic soils first and those preferring more alkaline soils last:

Potatoes, 4.5-6.0; sweet potatoes, 5.6-6.5; horseradish and rhubarb, 5.5-6.8; butternut squash, carrots, corn, eggplant, lettuce, peanuts, peppers, pumpkins and watermelon, 5.5-7.0; cucumbers, garlic, winter squash, and tomatoes, 5.5-7.5;  celery, 5.9-6.9; soybeans and strawberries, 6.0-6.8; onions, radishes, shallots and spinach, 6.0-7.0; beets, any of the Brassica family, peas, summer squash, Swiss chard, and zucchini, 6.0-7.5; okra, 6.0-8.0.


Photographs of Historic Florist Pansies

Standard

photo (134)photo (135) photo (136) photo (137) photo (139) photo (140) photo (141) photo (142)

This week I thought I would show pictures of the Historic Florist pansies I grew from seed.  The top photo is of my pansy bed; the others show the diversity of blooms and colors of antique pansies.  The flowers are fragrant and almost all of the blooms have a “face”.  More information is available in my first blog on this WordPress site, which describes the origin of pansies in England during the 1830s.

This week I am moving to Montana from Oregon, so this blog is one day late and quite brief.  I will manage a new organic nursery and greenhouse—a new division of Westland Seed, Inc., Ronan, Montana.

Happy growing!

April Gardening Calendar

Standard

photo (133)

April is another busy month for gardeners; usually a month characterized by ups and downs in temperature.  Keep watch for frosts; protect cold frames with mats if frosts are imminent, and admit air daily as weather permits.  Finish pruning fruit trees if not done, plant grapes; fertilize and prune blackberries.  Check your fruit trees and roses for pests as soon as they bud and leaf out and set out apple pest traps two weeks before bud break.  Weed and amend all your beds now while it is cool and moist.

Finish planting fruit trees, shrubs, roses, and perennials.  This month is a good time to direct sow (where they are to flower)seeds of several flowers: sweet alyssum, cornflowers, carnations, pinks, poppies, stocks, rose campion, Lychnis, columbines, valerian, honesty, foxglove, snapdragons, mignonette, larkspur, kiss-me-by-the-garden-gate and four-o’clocks.  Perennials still may be divided if weather has not become too warm.  Violets can be divided after blooming and cuttings taken of pansies.  Make cuttings of chrysanthemums, gauras, Helianthus, lupines, Lychnis, Liatris, knautias, saponarias, scutellarias and veronicas.  Dahlias and tigridias may be started inside in cold climates and planted out later after frosts are over, or planted outside if the soil temperature is above 60 degrees F.

Several vegetables can be direct sown if weather permits and it is not too cold: beets, arugula, carrots, caraway, celery, chervil, chives, cilantro, dill, fennel, collards, mache, fava beans, cress, kale, Jerusalem artichokes, kohlrabi, leeks, lettuce, mustard greens, rhubarb, turnip greens, onions, pasley, parsnips, peas, potatoes, radishes, salsify, scallions, spinach and Swiss chard.  Sunflowers and tomatillos can be sown two weeks before the last expected frost.

Corn may be sown after April 15th in cool maritime northwest climates, or a week or two later in the inland and mountain areas.  Usually corn is sown about 10 days to two weeks before the last frost.  Native Americans of the Hidatsa tribe living in the Dakotas planted sunflowers first, then corn, and after frosts followed with beans and finally, squash.  Sunflowers were grown by themselves in a field, but corn, beans and squash were grown together; with corn in hills of 6-8 and beans and squash vining through.

Vegetables started last month indoors may be planted out this month: the brassicas, parsley, Asian greens, rhubarb and tomatoes; once frosts are over.

Prune established roses before bud break and seal the cuts with water-based glue or wood glue.  This prevents drilling wasps from injuring the canes.  Fertilize organically with Epsom salts, manure or compost, bone meal or rock phosphate, alfalfa meal and seaweed or wood ashes.

A few things maybe grafted now: grapes, hollies, pears, maples, pines and clematis.  Layers can be made of Cotoneaster, Cotinus, Hydrangea, Lavandula, Lonicera and Parthenocissus. 

Enjoy spring!

Starting Seeds Indoors

Standard

photo (127) photo (128)

Many of us get a good feeling from planting seeds and watching them grow when outside it is still dark and cold.  But inside, we are planning for spring planting.  We can start the varieties we want—perhaps a favorite is not available locally as a transplant or as seed; we can raise it ourselves from seed!

Most everyone I know has good luck starting seeds in a sterilized seedling mix.  It may be difficult to find an organic seedling mix; and it must be sterile or seedlings might dampen off from fungi present in the air and abundant in unpasteurized soil mixes.  A mix I make is soil free: 6 parts sterile (pasteurized)peat moss + 3 parts fine perlite + 1 part washed coarse sand.  If you are unsure if your mixture is sterile or not the mix may be heated in an oven at 160 degrees for one hour.  Do not allow the mix to heat above 180 degrees.  A mixture including compost would need to be sterilized by heating to use for seedlings.

Several types of containers might be used to start your seedlings.  In the first picture above, I used a milk carton cut laterally, providing two useful containers.  Shown are pepper seedlings.  Peat pots work well for plants that are difficult to transplant, because they minimize transplant shock and biodegrade into the soil.  Be sure to keep them quite moist once planted, because if the peat pots become too dry, roots will not penetrate the container.  Some plants that benefit from being raised in peat pots and are difficult to transplant are: portulaca, nasturtiums, sunflowers, poppies, eggplant, squash, cucumbers, melons and pumpkins.  Peat pellets also work, but they sometimes are so hard that roots have difficulty growing in them.

Timing is another important factor in raising seedlings.  Your transplants should be big enough to mature and produce in your season, but not too big, or they will not take off well and will take up a lot of room in the house.  Here is a basic seed planting guide, categorized month-by-month, of which seeds to plant at what time for success in northern climates of 100 to 170 days.  (Adjust timings to your local climate):

In January plant impatiens, begonias, geraniums and salvias.  Late January or early February is a good time to start eggplant, peppers, onions, petunias and pansies.  March is probably the best month to start cole crops (brassica family).  April is a good time to start tomatoes and balsam; late April or early May for pumpkins, squash, melons, cucumbers, and nasturtiums.

Florescent grow lights with an adjustable chain are a great help in starting nice seedlings; the lights can be lowered with the chain to keep the newly emerged seedlings in bright light.  This will prevent your plants from getting “leggy”.   Temperatures vary for germination: cole crops about 65 degrees, onions about 70, tomatoes about 75 and eggplant, peppers, squash, melons, cucumbers and nasturtiums about 80 degrees.

Make sure your seedling mix is not too wet.  Some seeds like to germinate on the dry side, such as tomatoes and peppers.  I cover my newly-planted seeds with plastic wrap, but check them twice daily for moisture and rotate them if necessary.  Once the seeds are just up, I loosen the wrap (a little more each day) to harden the babies off to the air.  Grow your plants on in cooler conditions than you germinated them and they will grow stockier.  A cold frame is just about the best place you can put them if it is not too cold outside.  In a south-facing cold frame the soil will remain warm at night, and daytime venting will give the plants fresh air.  Keep shade cloth handy if it tends to get too hot during the day in your area.  This is a common occurrence in dry, sunny climates with warm days and frosty nights.  The second picture above shows newly transplanted seedlings in a cold frame vented for the day.  A cold frame will harden-off your plants before planting out.  Don’t forget to place open-ended containers around plants as you place them in the garden to deter cutworms.  Good luck!